
Screenprinting is the process which involves applying very thin and even layers of colour on to a surface (which could be paper, fabric, wood, metal – pretty much anything flat). The colour is pushed through a fine mesh screen, which is stretched over a square or rectangular frame. An image is made by masking areas of the screen to stop the colour from going through those parts of the screen. Such a mask can be made in a variety of ways. A mask can be exposed to a screen which has been coated in a light sensitive emulsion, or a painterly mask can be applied freehand by the artist using drawing fluid. However as a newcomer to this process I have enjoyed working with simple paper stencils for creating a mask. This article offers some tips on how to get started with screenprint, using basic equipment which is easy to use at home or in a small working area.
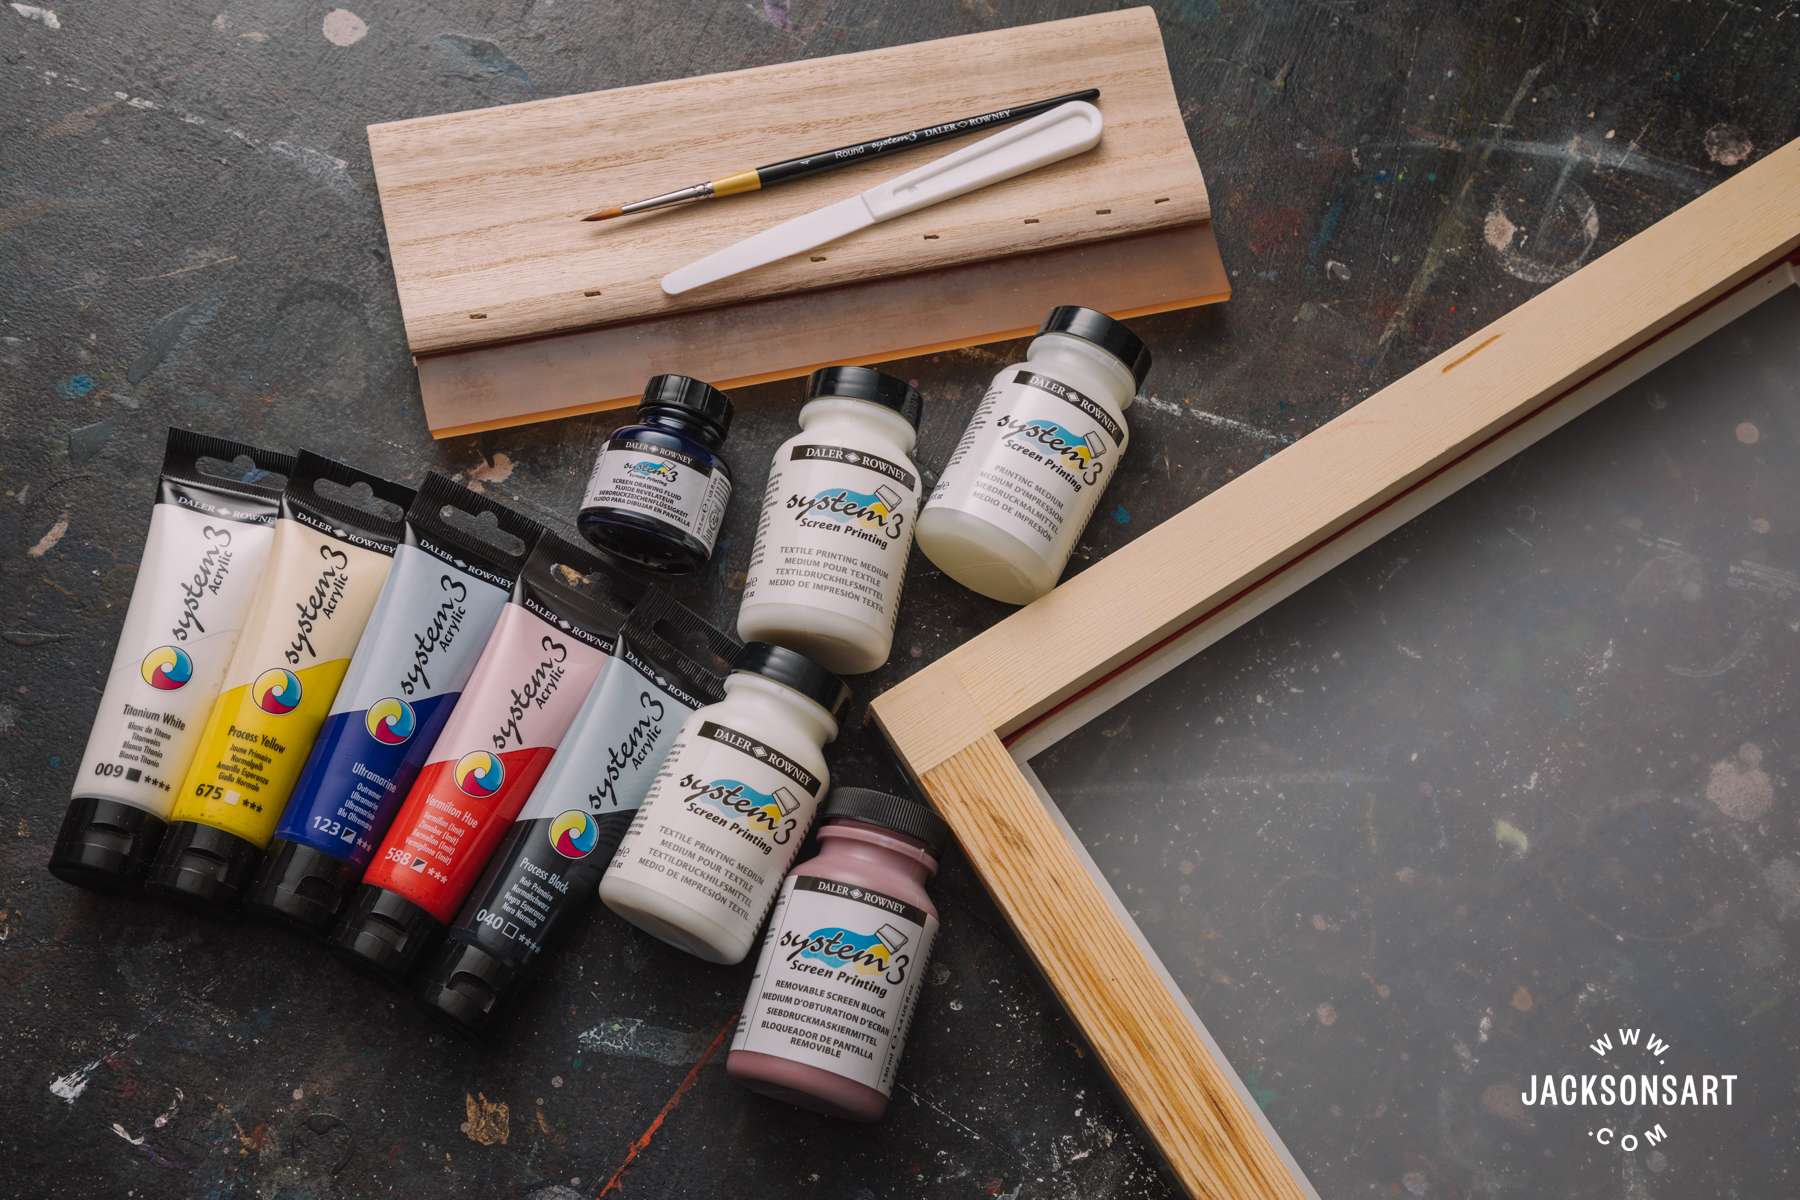
Contents of the Daler Rowney Screenprinting Beginners’ set
Recommended Materials for Screenprinting
Daler Rowney Screen Printing Set
Additional Screen Printing Medium (optional)
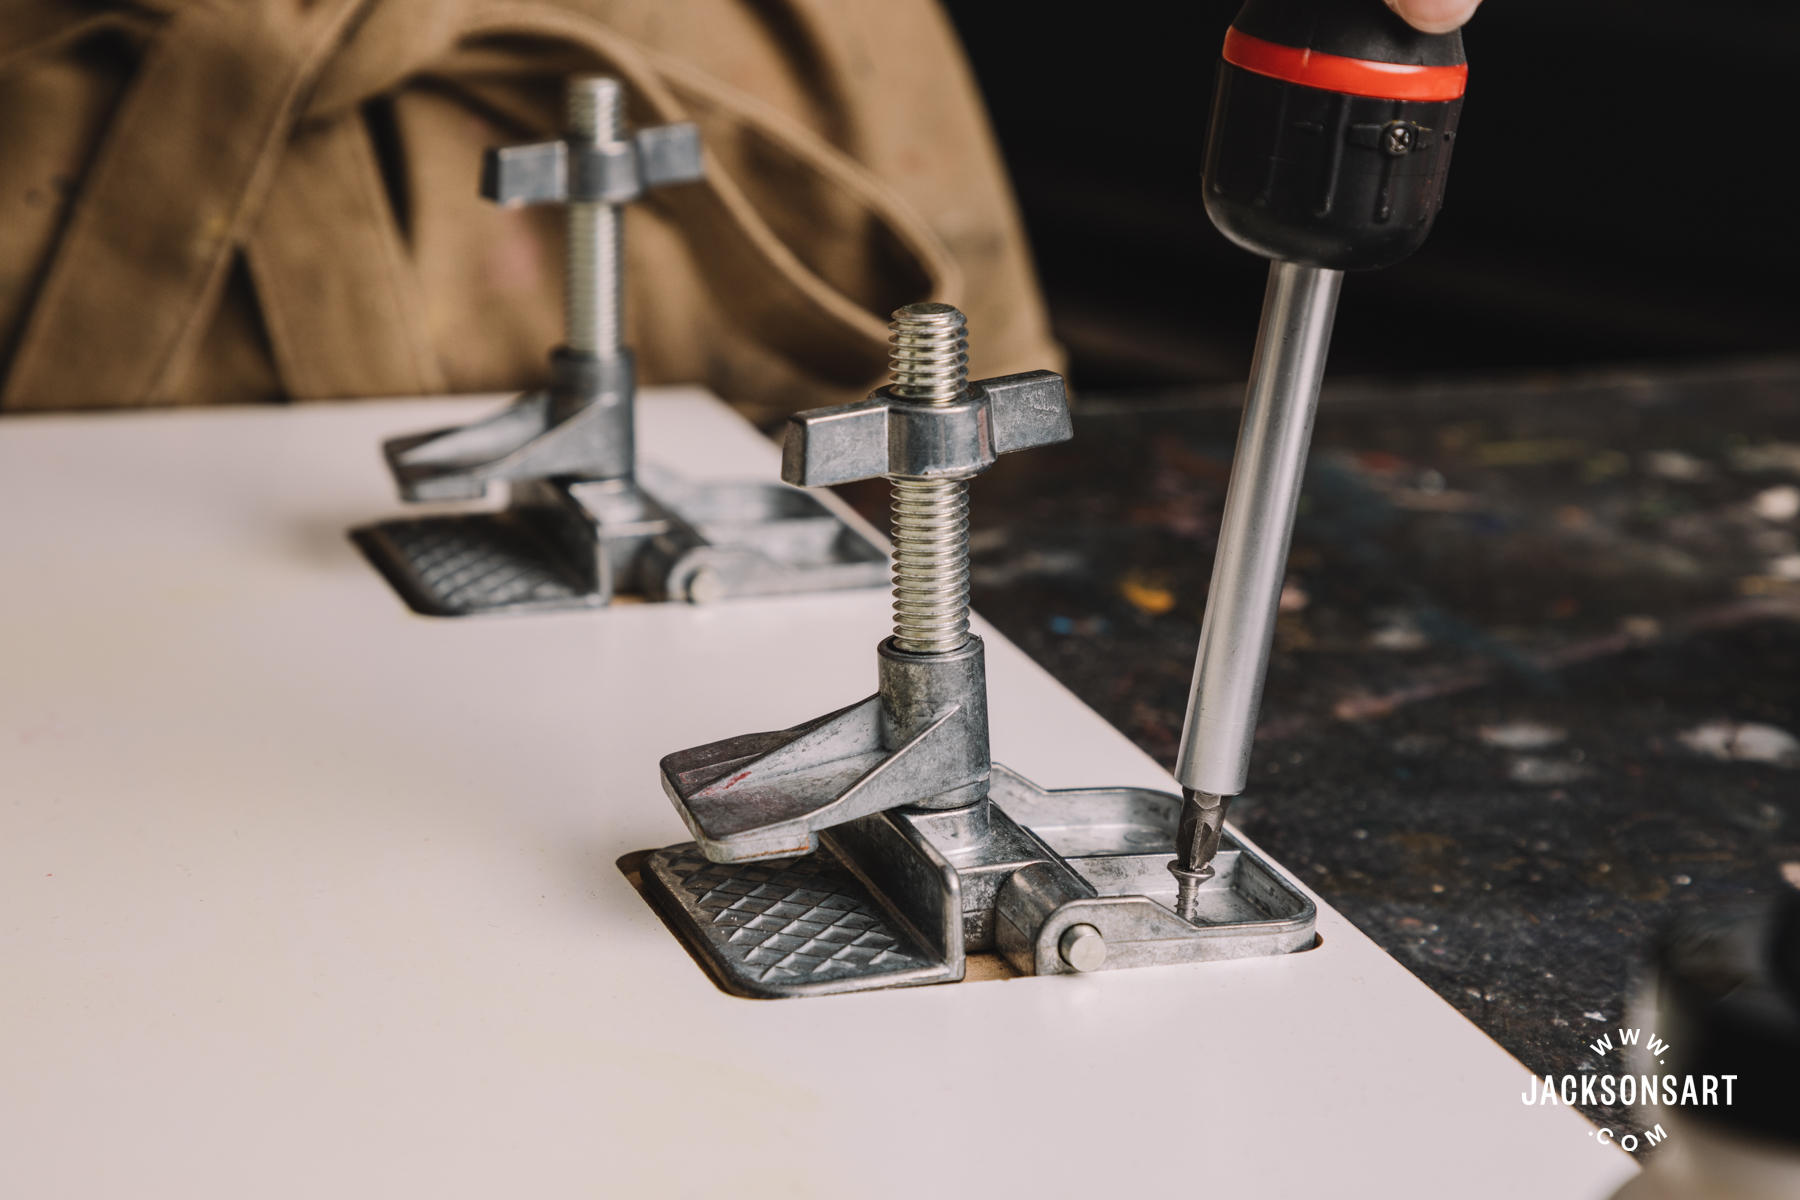
Speedball Hinge Clamps
A board to screw your hinge clamps to (Plywood or MDF)
Newsprint
Scalpel
Cutting Mat
Paper to print on to (I used Fabriano Rosaspina but you can use any paper of around 190gsm or more)
Pots with airtight lids
Brown Parcel Tape
Pencil (to draw on to newsprint with)
Apron
Masking Tape
Small pieces of card (mountboard offcuts are perfect if you have any)
You will also need somewhere to put the prints to dry – a clear table top or a string hung up with pegs is ideal, if you don’t have a printmaker’s drying rack.
The Daler Rowney Screenprinting Beginner’s set is a great investment if you want to try the process at home or in your studio without needing to invest in a vacuum table or carousel. In the set you will get a good quality screen and squeegee along with a primary colour set of acrylics, screenprint medium for fabric and paper, and a bottle of drawing fluid. You also get a sturdy plastic palette knife, which is preferable to use with the screen to a metal palette knife which is more likely to tear a hole in the screen.
Before you start, I recommend that you take the time to apply a couple of coats of yacht varnish to your squeegee handle and the frame of your screen. This is because they are made from uncoated wood, and if you get to a point of screenprinting regularly, frequent washing of your equipment with water may eventually cause premature wearing of the wood. The yacht varnish will help prolong the lifespan of the squeegee and the screen.
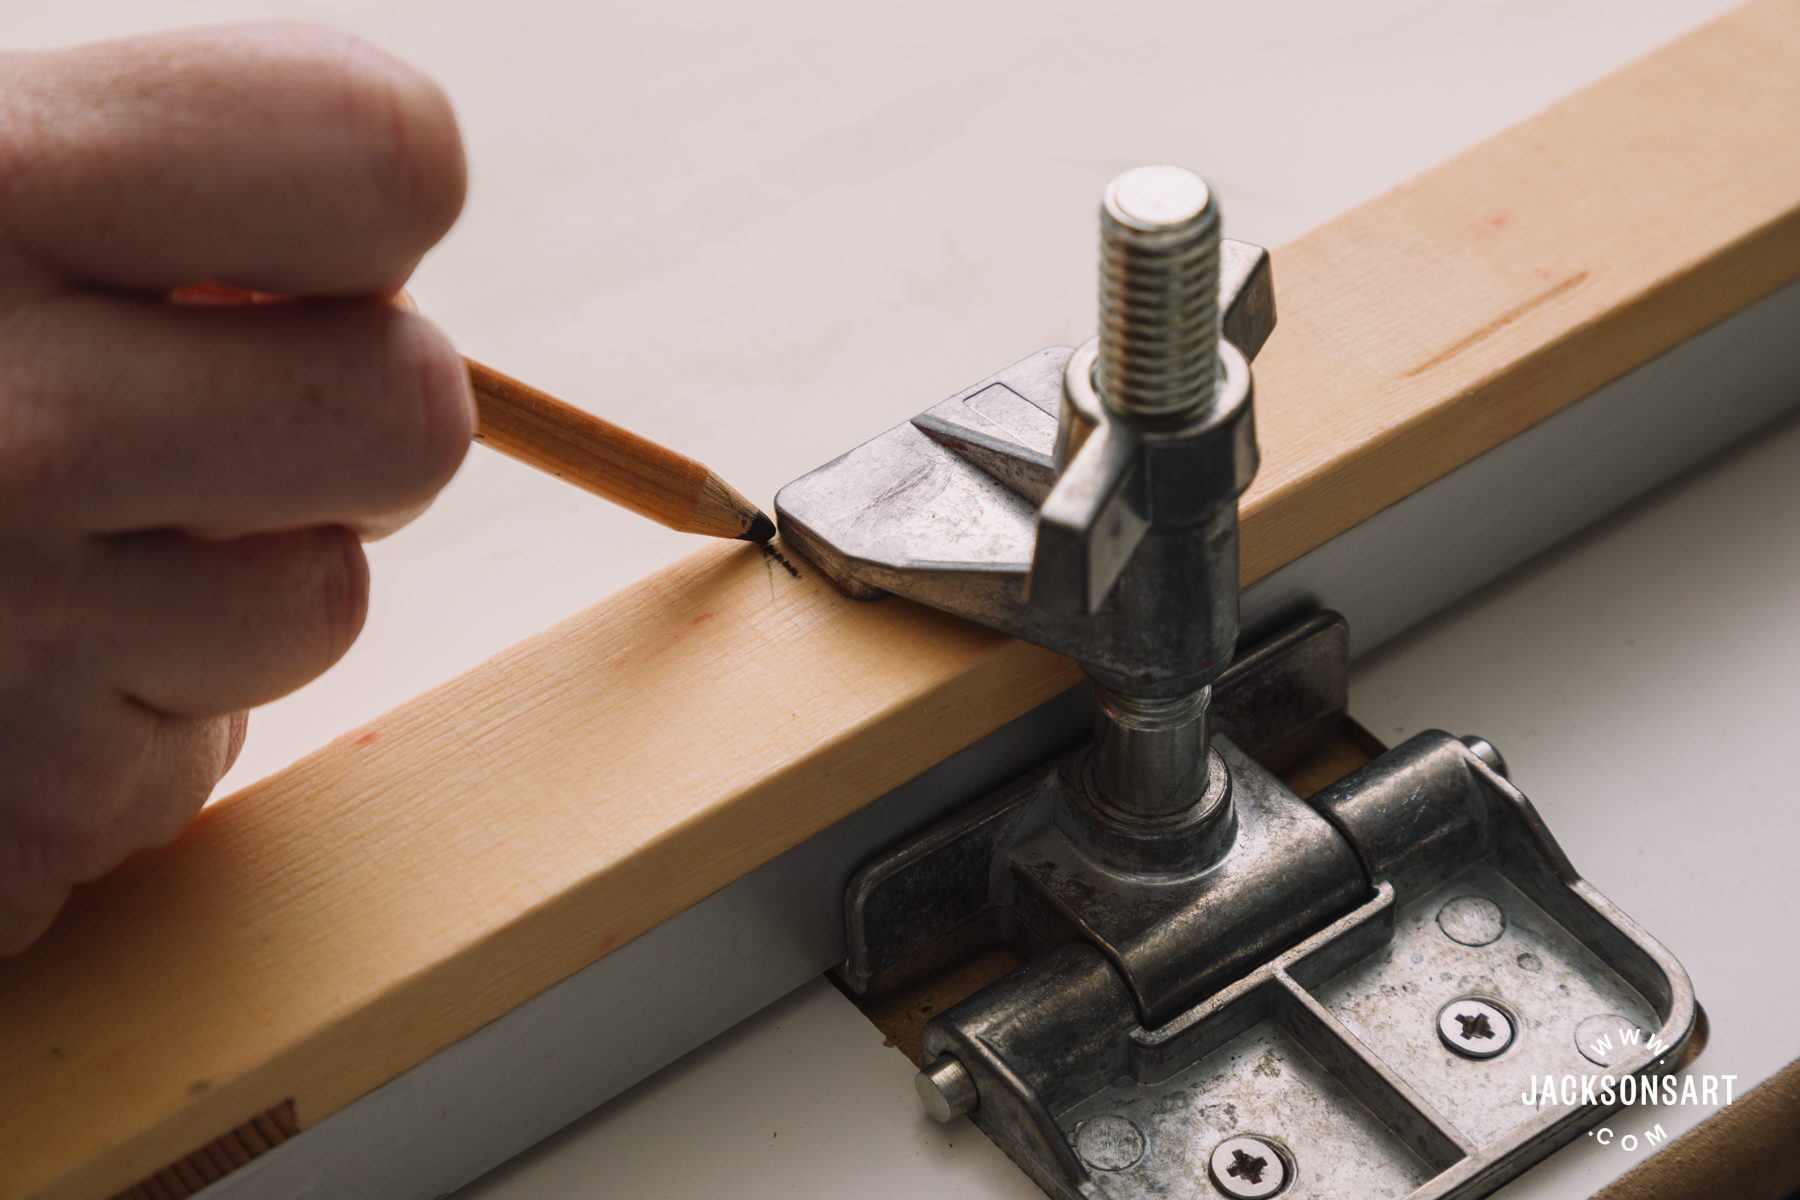
In addition to the screenprinting set, Speedball’s screenprinting clamps, and a sturdy board you can use as a screenprinting table are two other pieces of equipment worth investing in. The board can just be any piece of primed or coated MDF or plywood that you can wipe wet paint from, that is a few centimetres bigger than your screen (at least). If you have a work bench in your studio that you don’t feel too precious about that has a smooth surface, you could easily use this, so long as you don’t mind screwing the clamps into the top of it! The clamps should be about 10cm in from either side of the screen and parallel to one another. If you have the means to chisel a square into your board so the lower part of the grip sits level with the surface of the board, this would help to maximise the printing area of the screen, but it’s not essential.
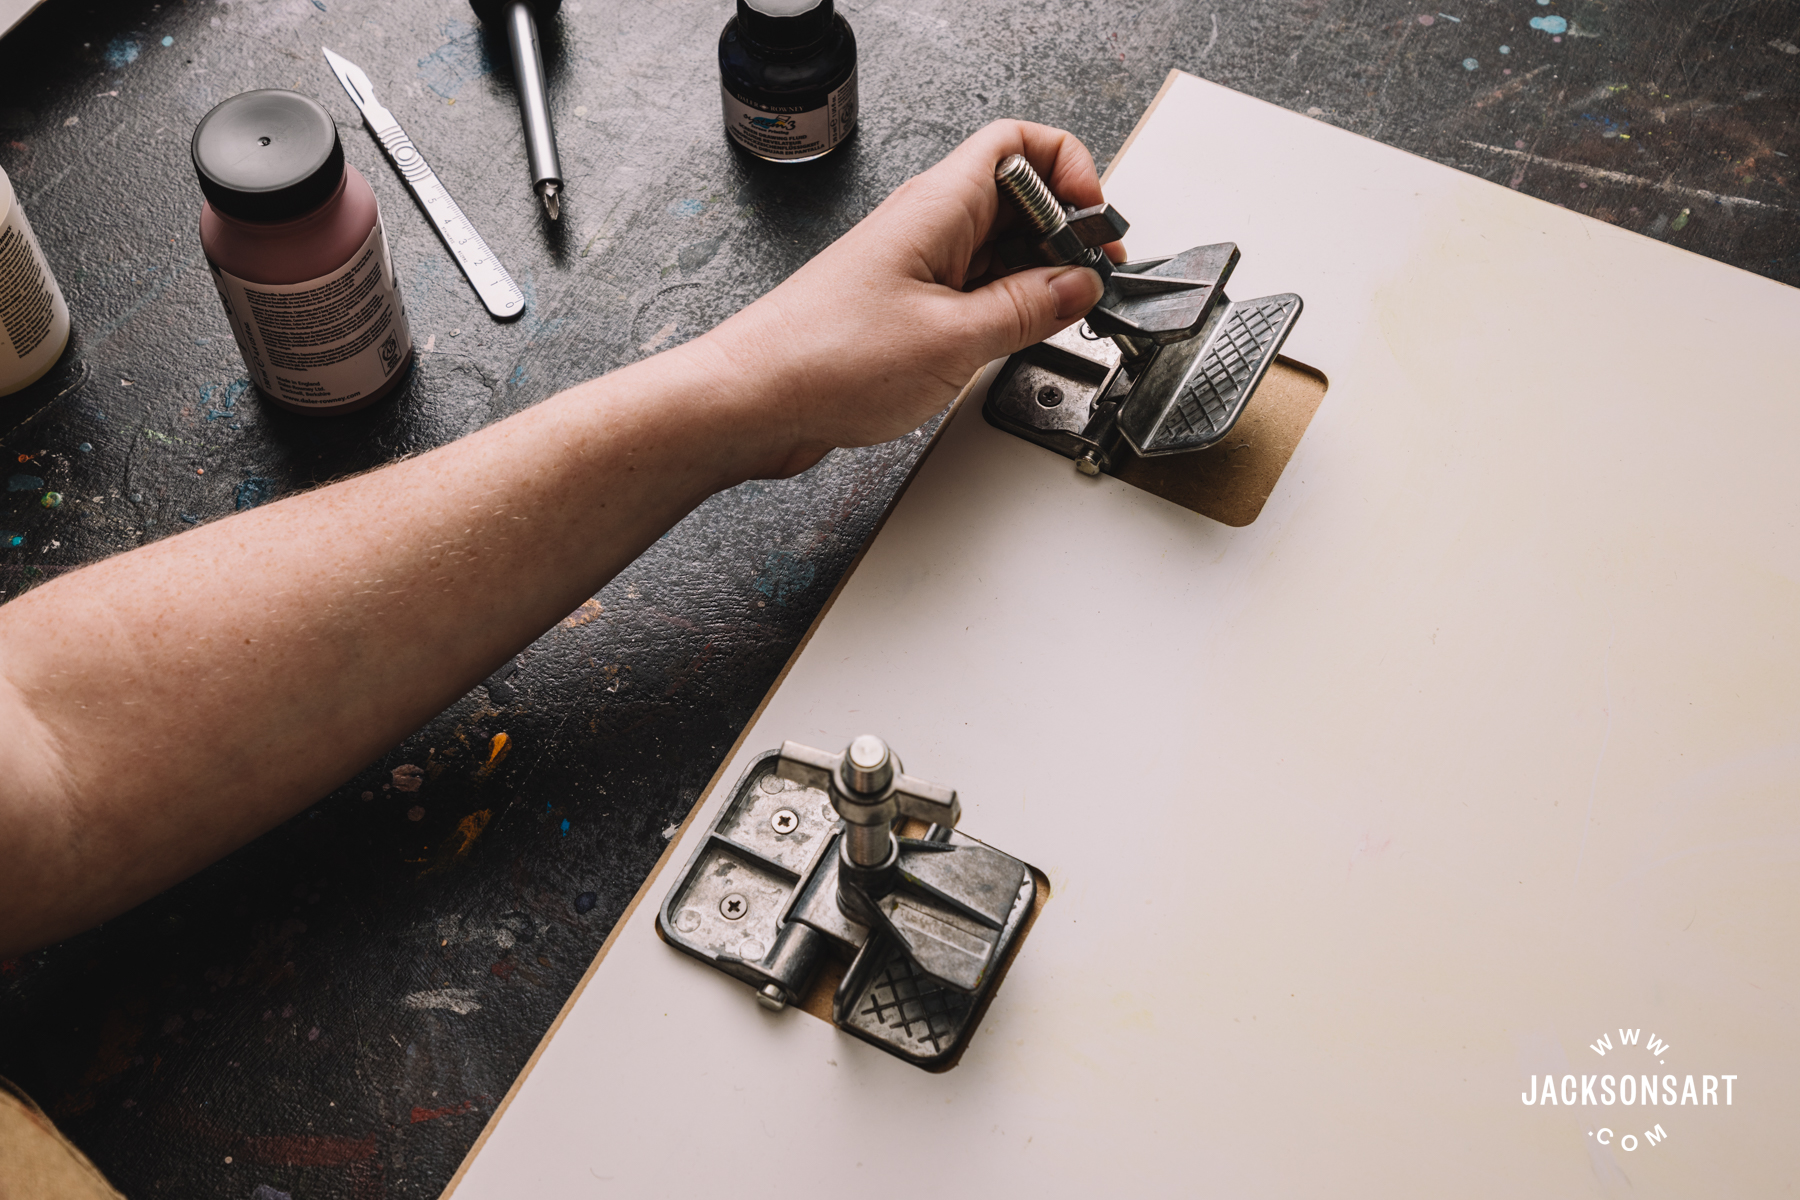
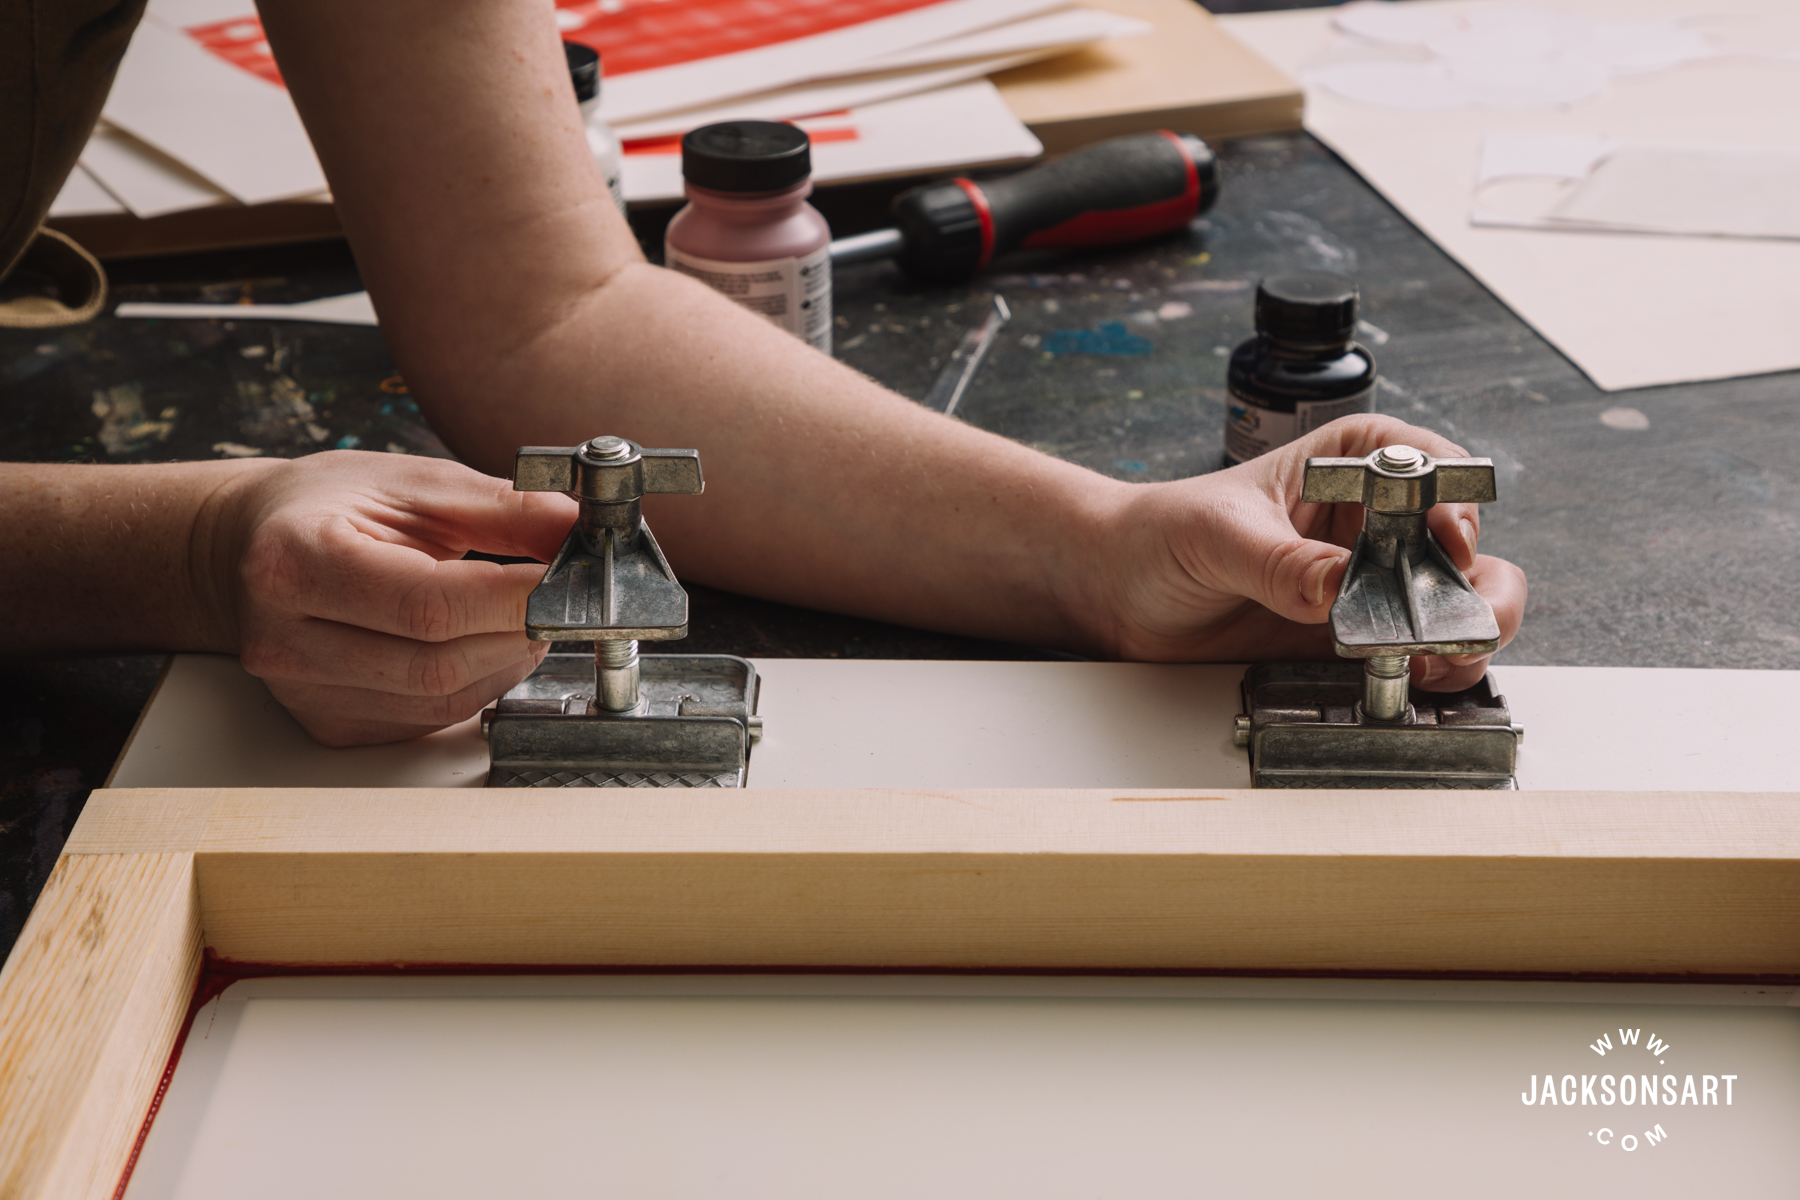
Once your clamps are in place you can put your screen in place to make your screenprinting table.
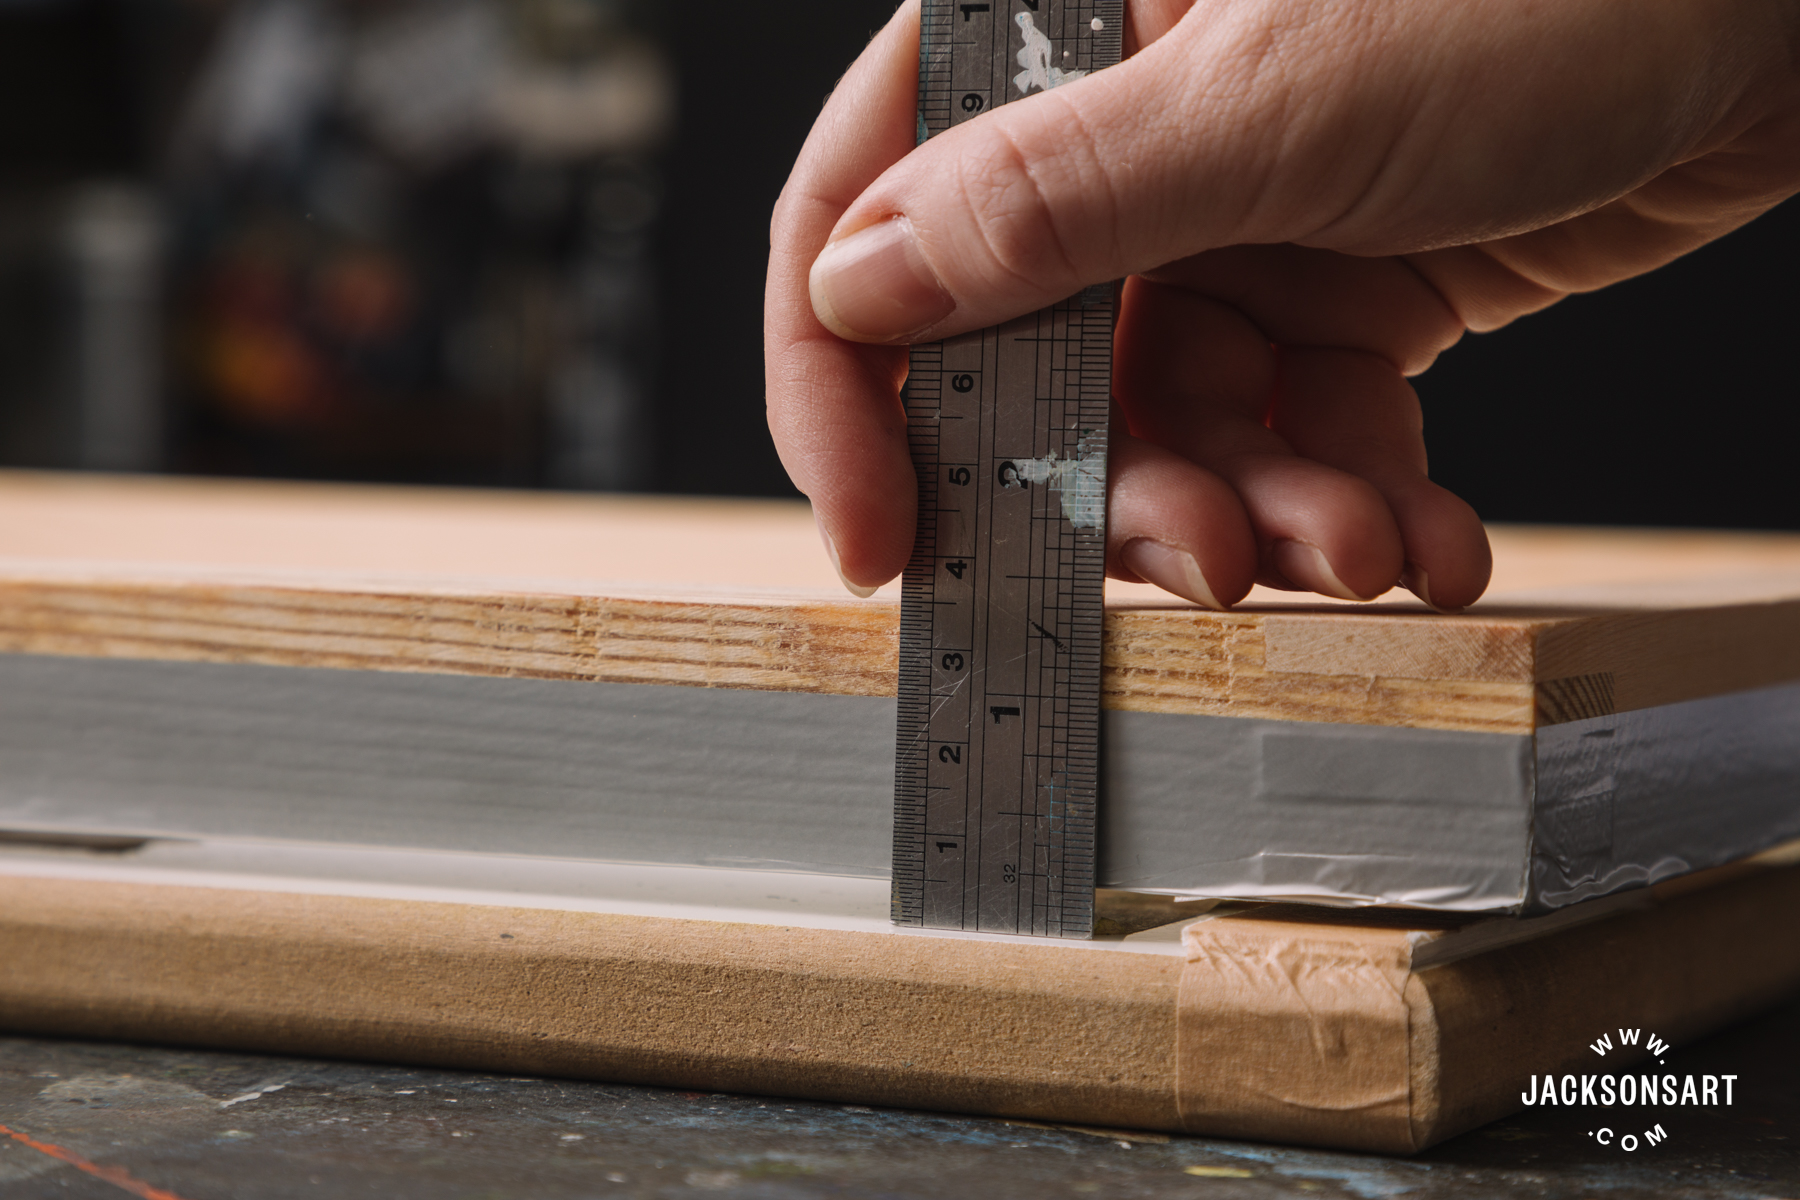
Measuring the gap between the screen and the board – this gap needs to be the same distance at both ends of the screen to achieve a nice even print. You might want to tape an offcut of mountboard at the opposite end of the clamps to achieve this.
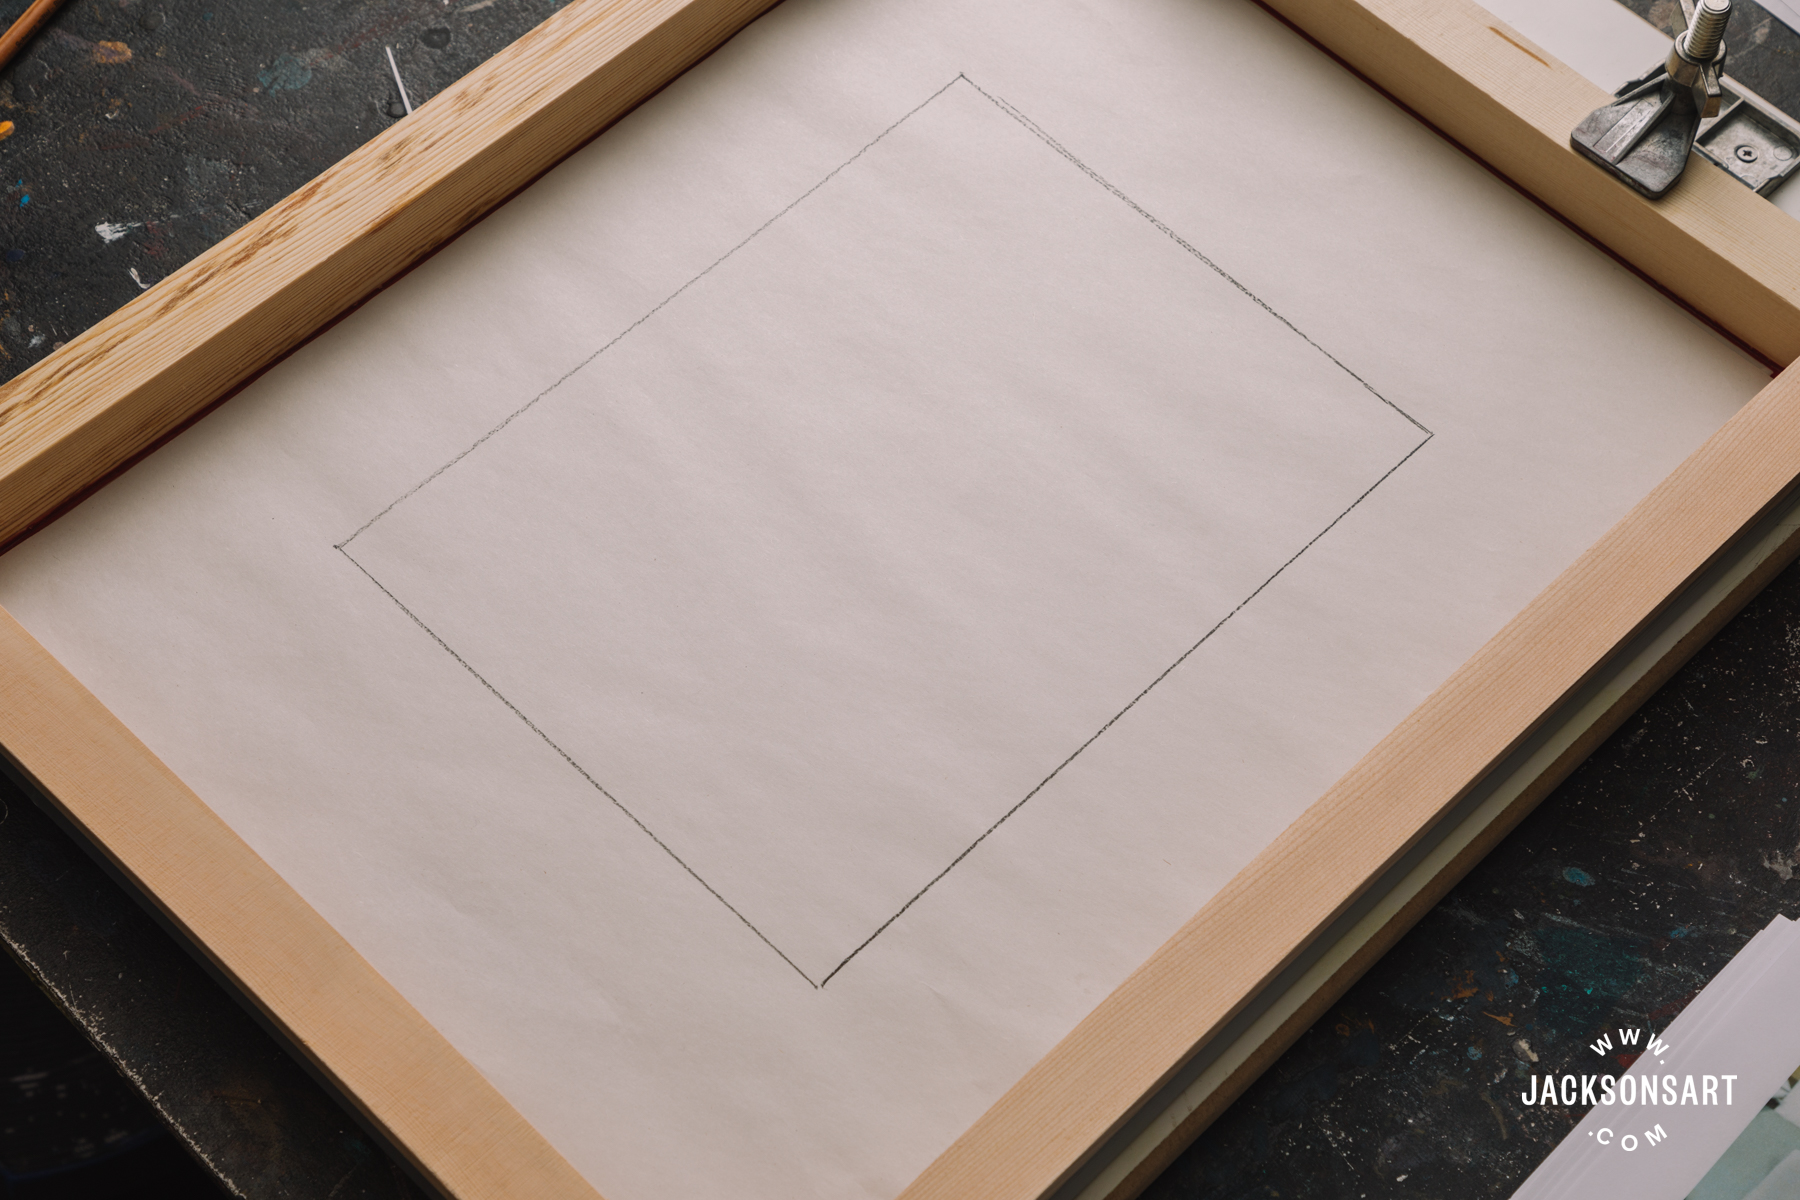
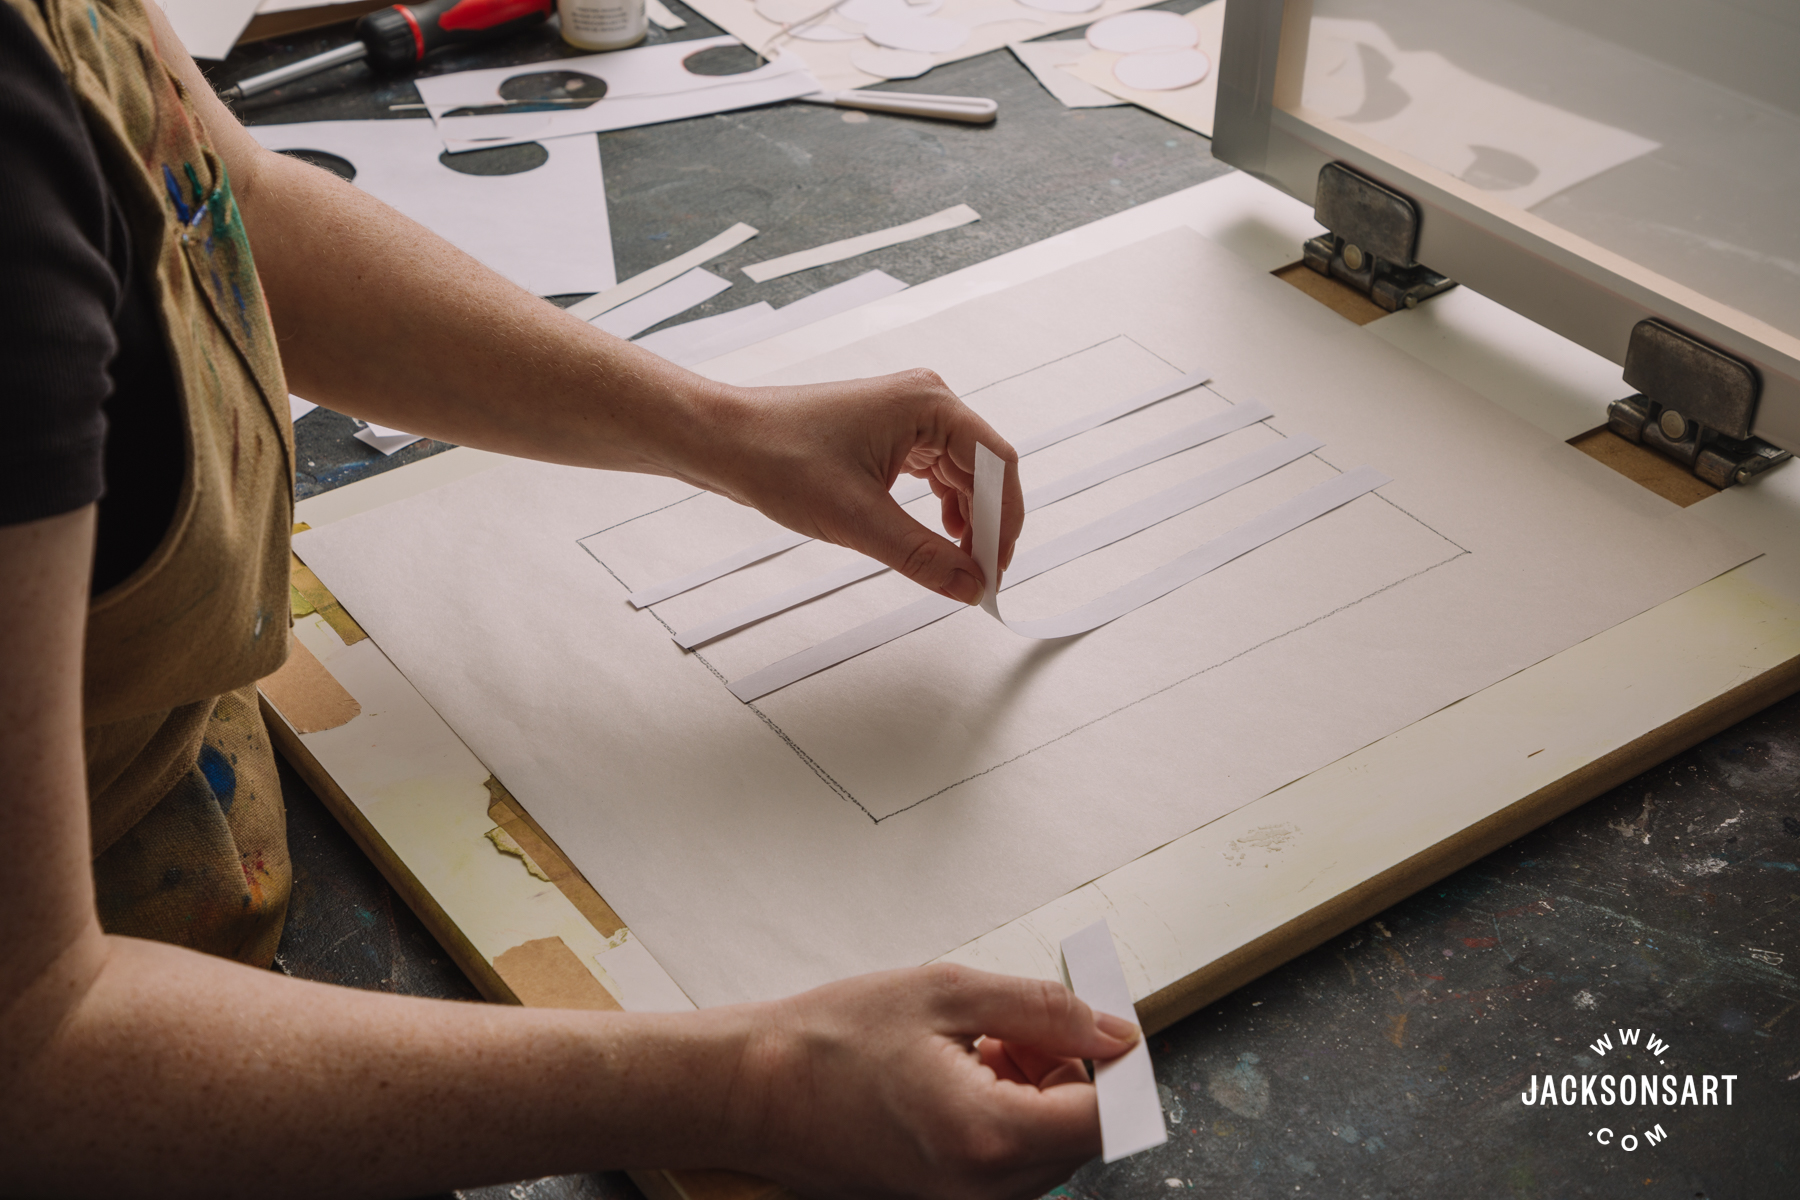
When making a screenprint, you cannot pull a print that is the same size as your screen. This is because pulling a print involves a downwards and forwards pressure with your squeegee, which pushes the screen down to the surface you are printing on. As the frame holds the screen taut, there will always be a border around the inside edge of the screen that will not make the right amount of contact needed with the paper for a sucessful print. When you are starting out, I would always recommend starting with a small image as they are easier to print, and then as you improve your printing technique, you can think about making larger images. The rectangle I have drawn on this piece of newsprint cut to the same size as the screen is an indication of the kind of size of image I would advise you start with; it’s also the size of the image I made for this article. Try to keep your image/printing area as central on your screen as possible.
Newsprint is the perfect stencilling material for screenprint. It is thin but strong enough to withstand the paint/ink, and when it is used as a stencil in screenprint it usually sticks with ease to the screen, allowing you to use the same stencil for a number of prints – a limited edition, if you will! It is perfectly normal for it to take a few attempts before you get the technique of pulling a print right, so it’s always worth printing a number of images in case subsequent layers of colour don’t quite go to plan.
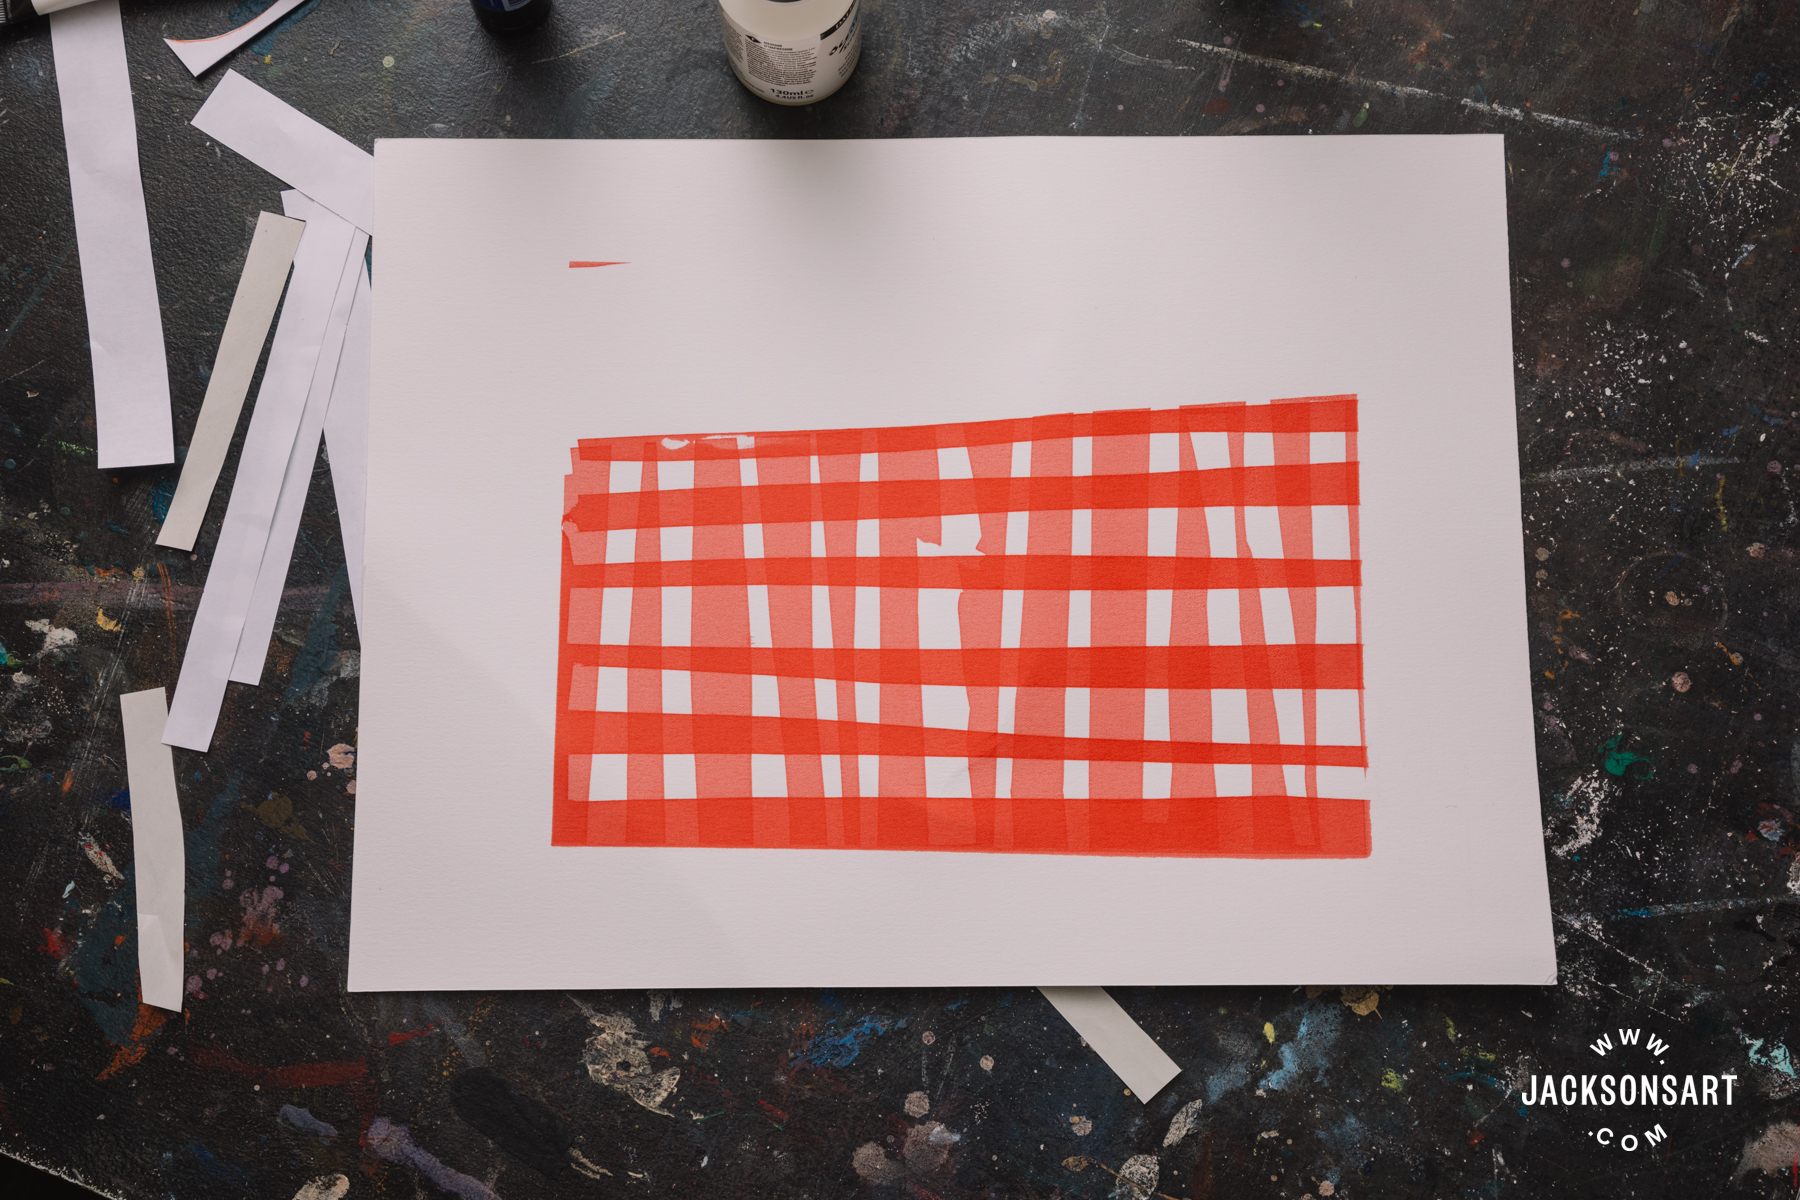
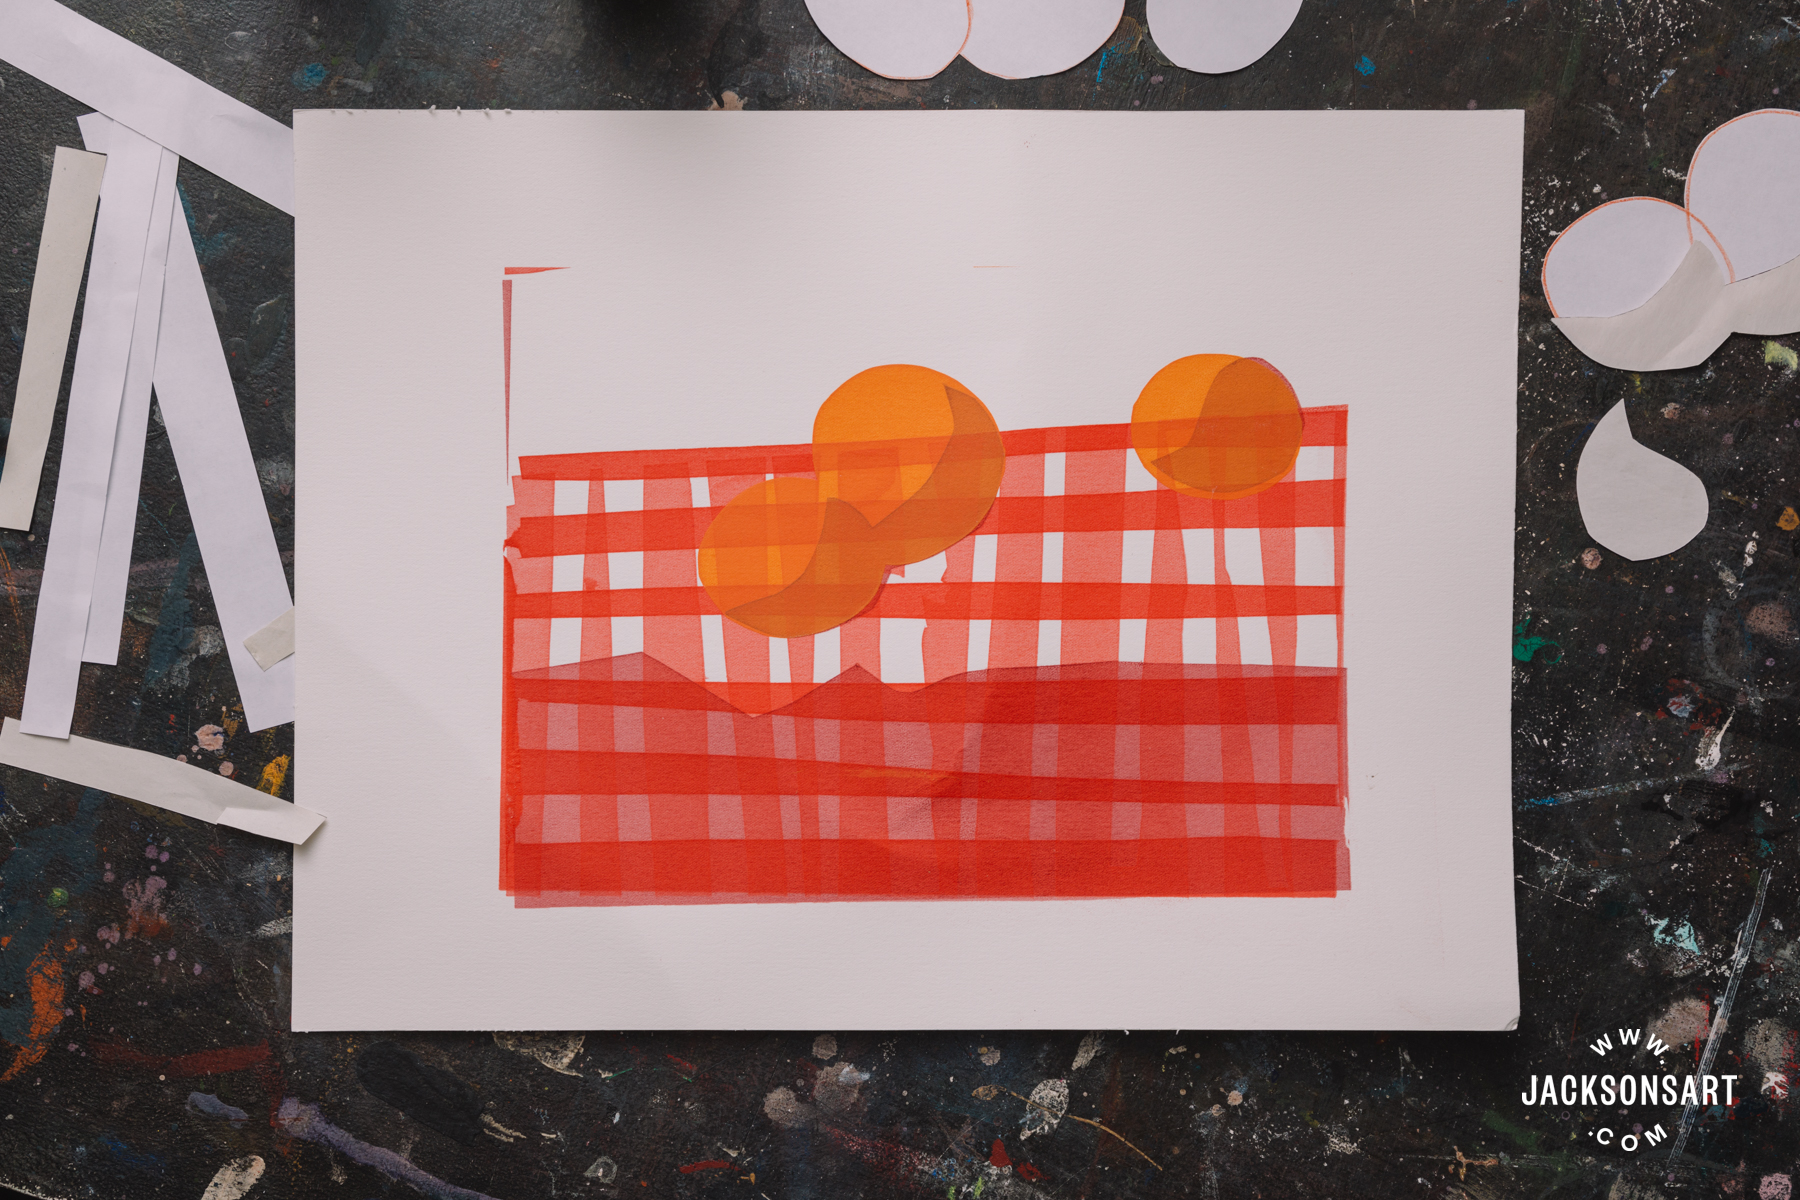
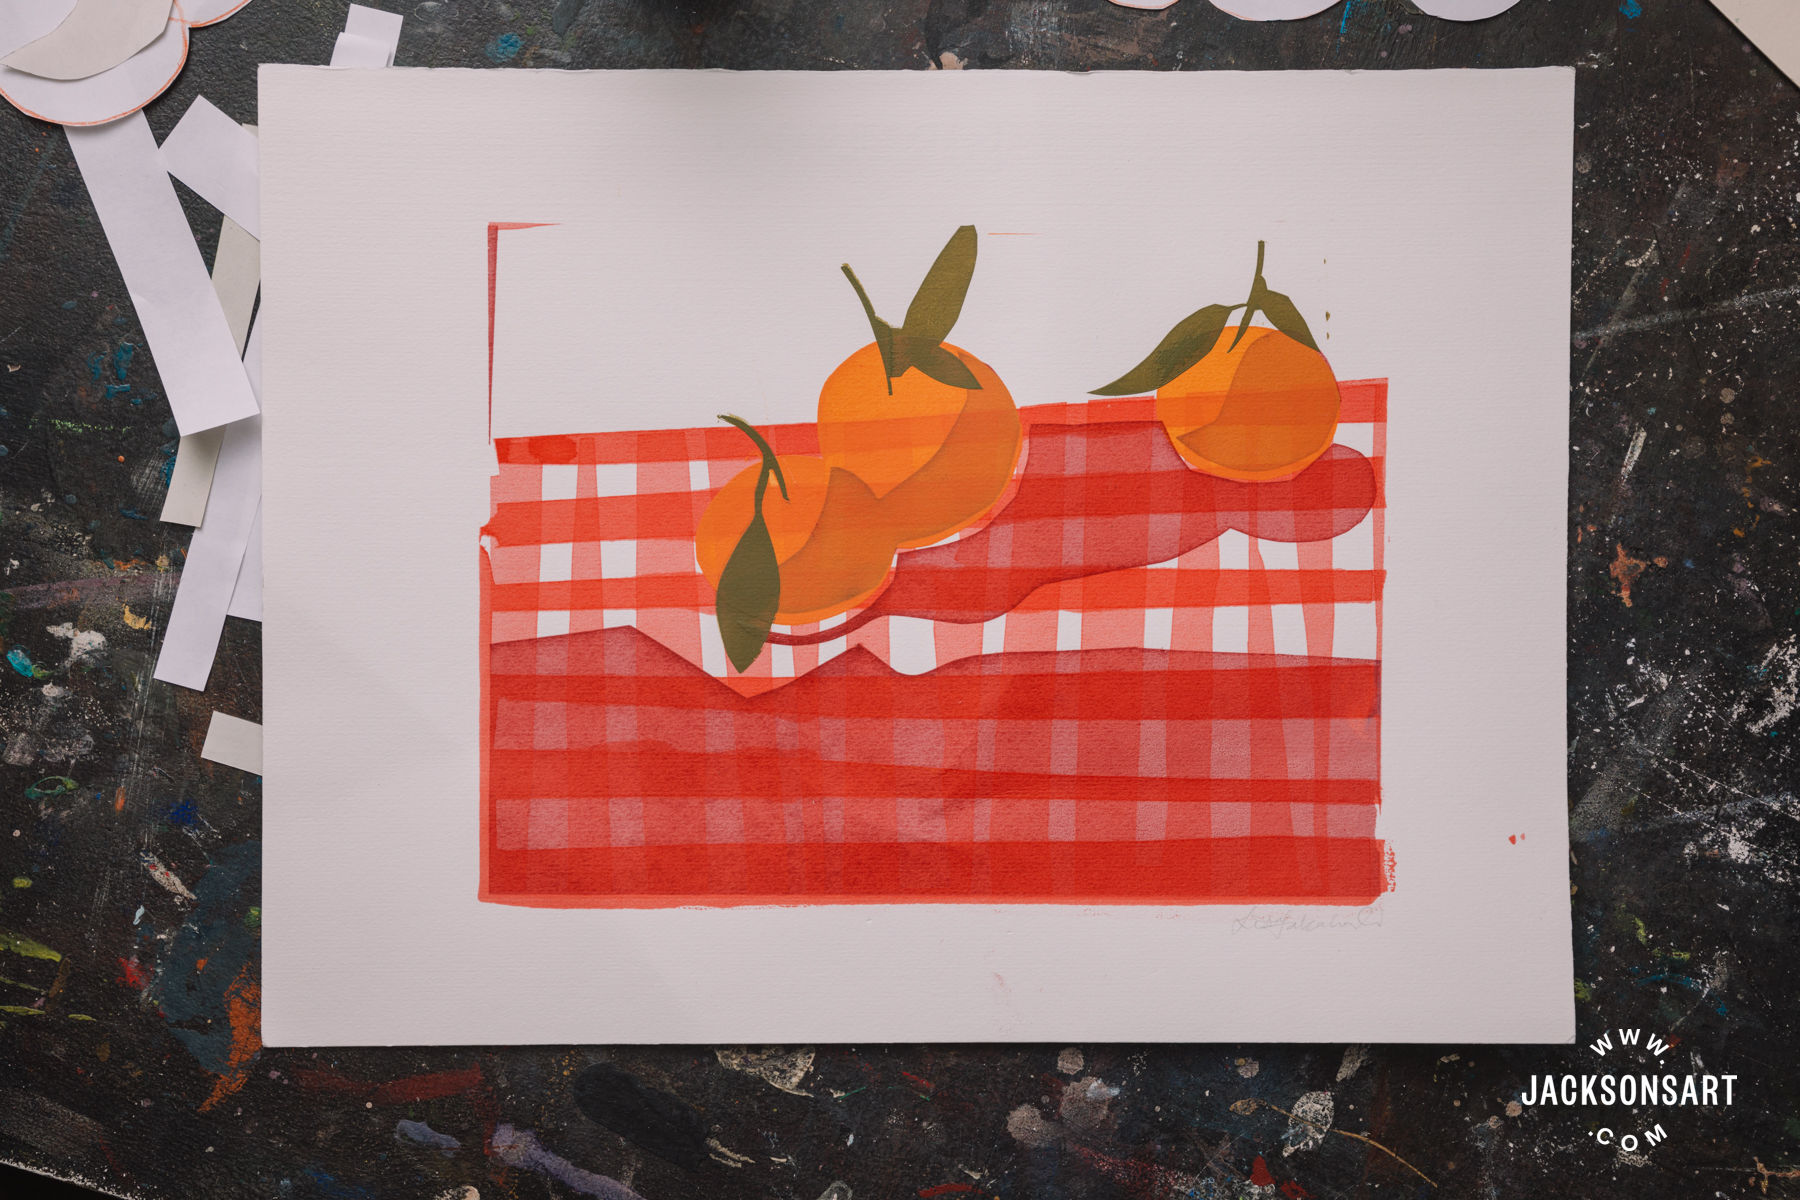
You can then start to cut your first stencil from the sheet of newsprint. I wanted to print a simple still life of oranges on a gingham table cloth in a number of layers, so I began by cutting horizontal stripes across the table area of the image using a craft knife.
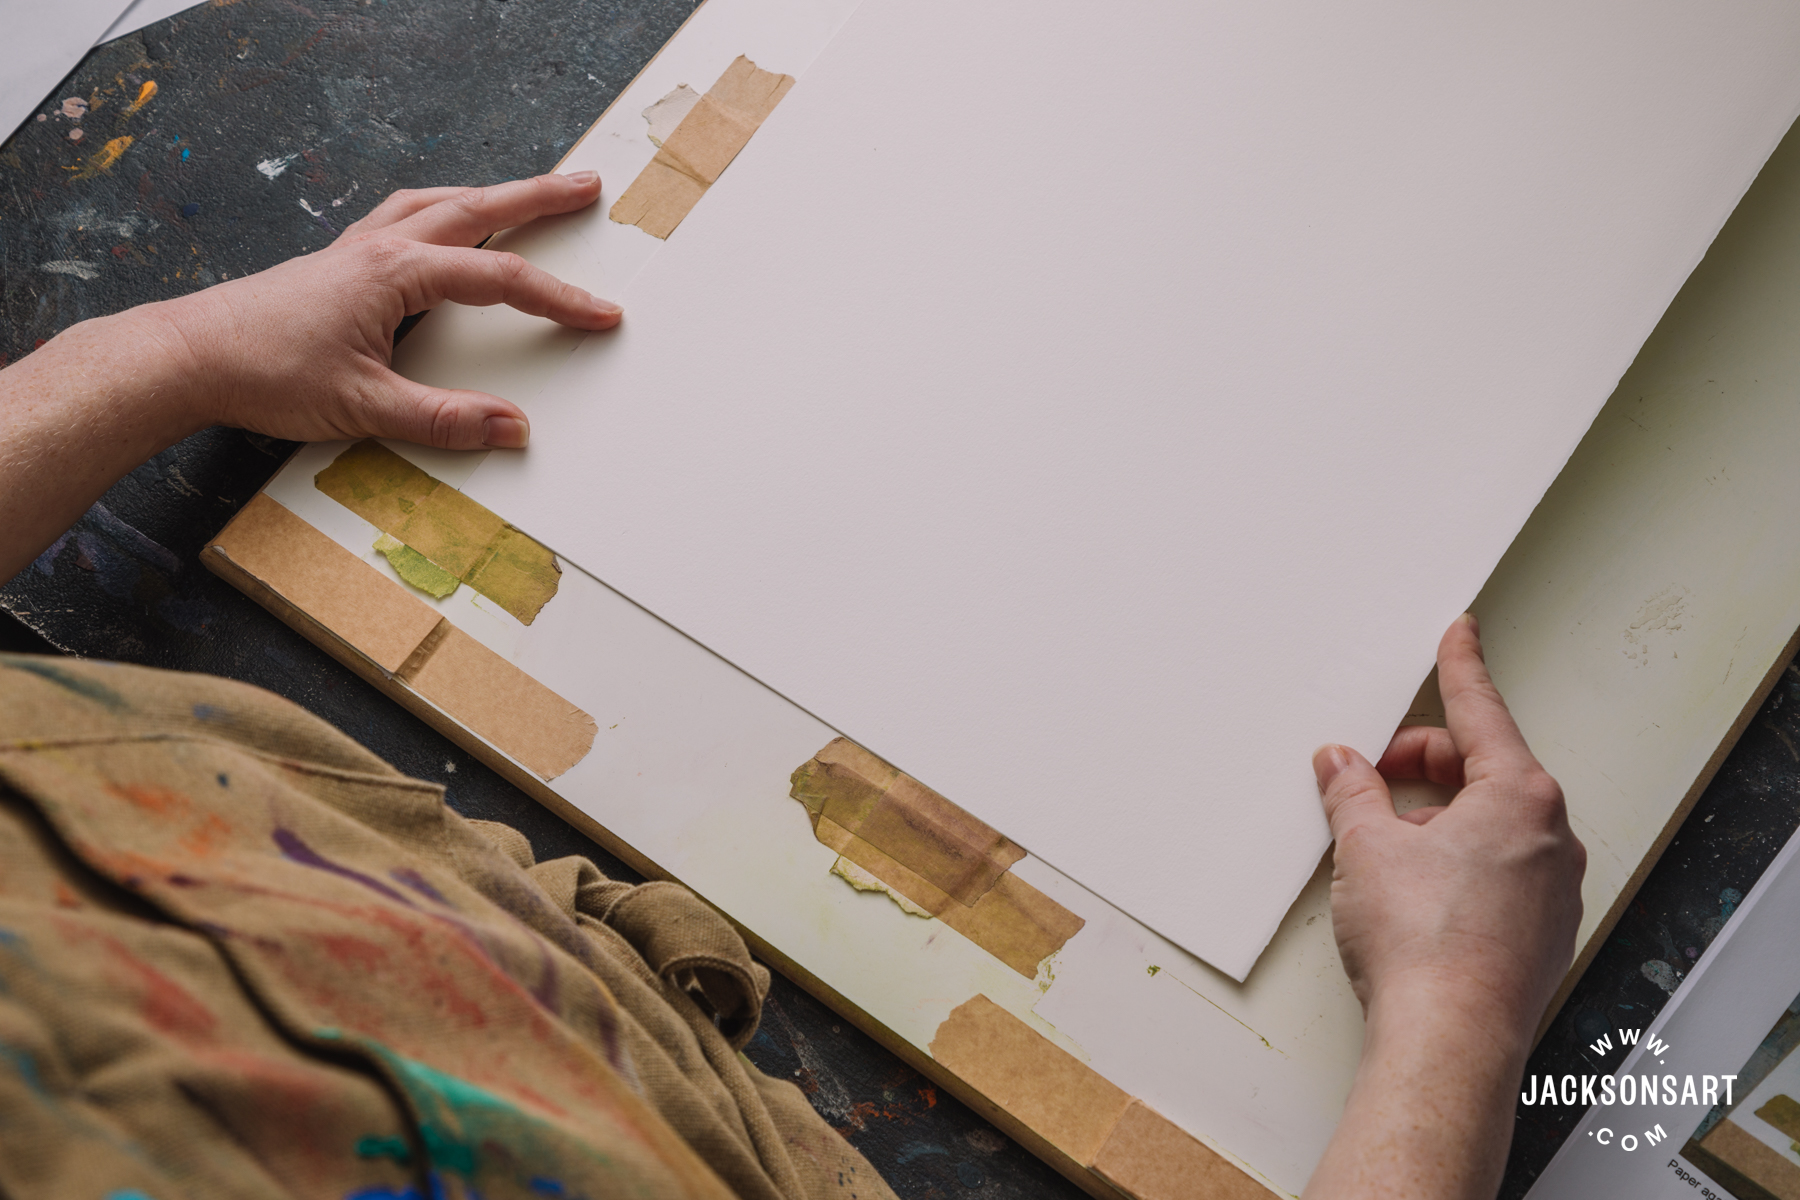
Once I had done this I cut my printing paper to size. Fabriano Rosaspina is my paper of choice as it has a good weight to it which means it doesn’t wrinkle when printed on to. You could use any other fairly weighty printmaking paper or cartridge paper (190gsm+, and smooth). I cut the Rosaspina to the same size as the screen/piece of newsprint I used for my first stencil.
You’ll then need to tape some registration guides to your board. There would ideally be one to guide the length of your paper along one side, and then another to guide the bottom edge of your paper. A mountboard offcut or a piece of cardboard is perfect for this, taped down with masking tape. By ensuring your paper is placed against these two guides your printed image will be positioned in the same place on each sheet, which will in turn ensure correct registration for subsequent layers of colour.
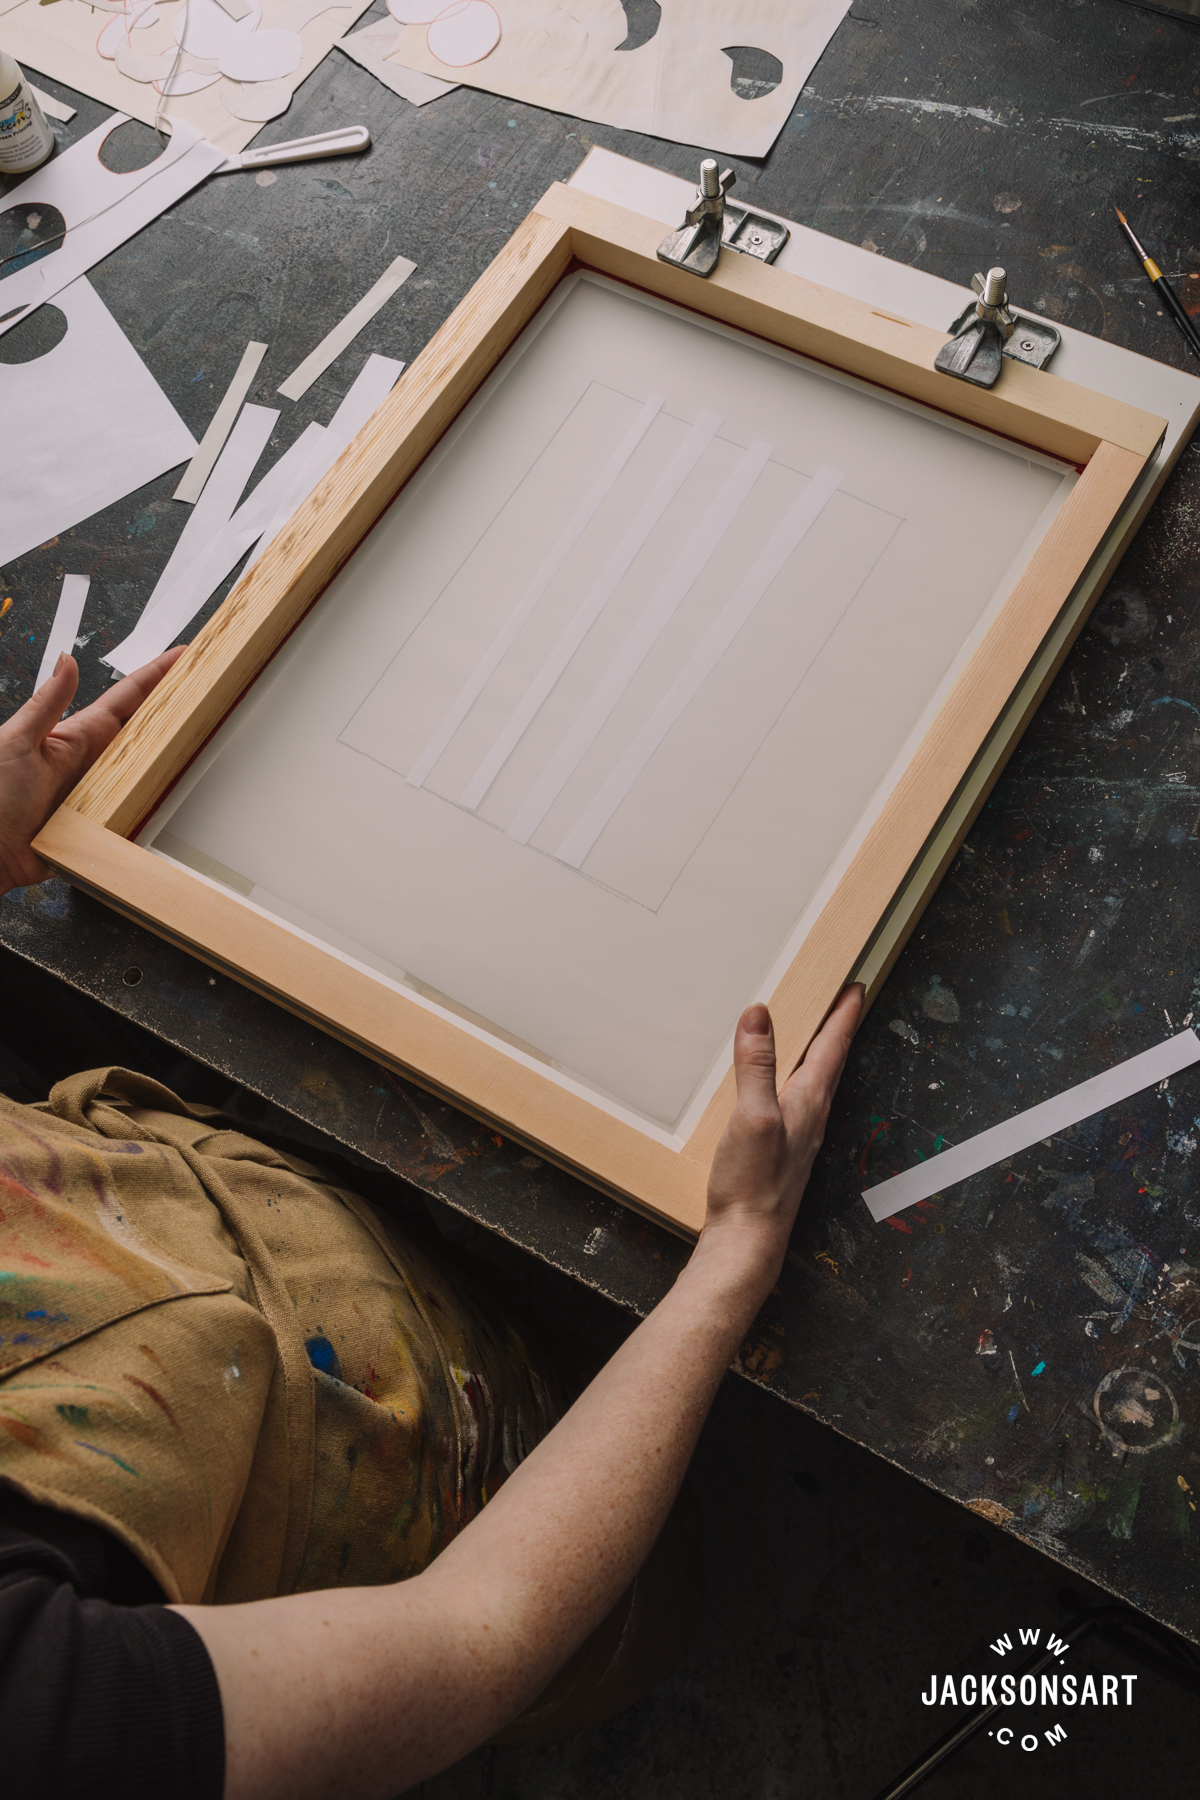
Place your first sheet of paper to print on within your guides, and then put your first stencil on top of this. Your may choose to print on a sheet of newsprint or a scrap piece of paper first, so you can see if the stencil works and the printed layer looks how you would like it to.
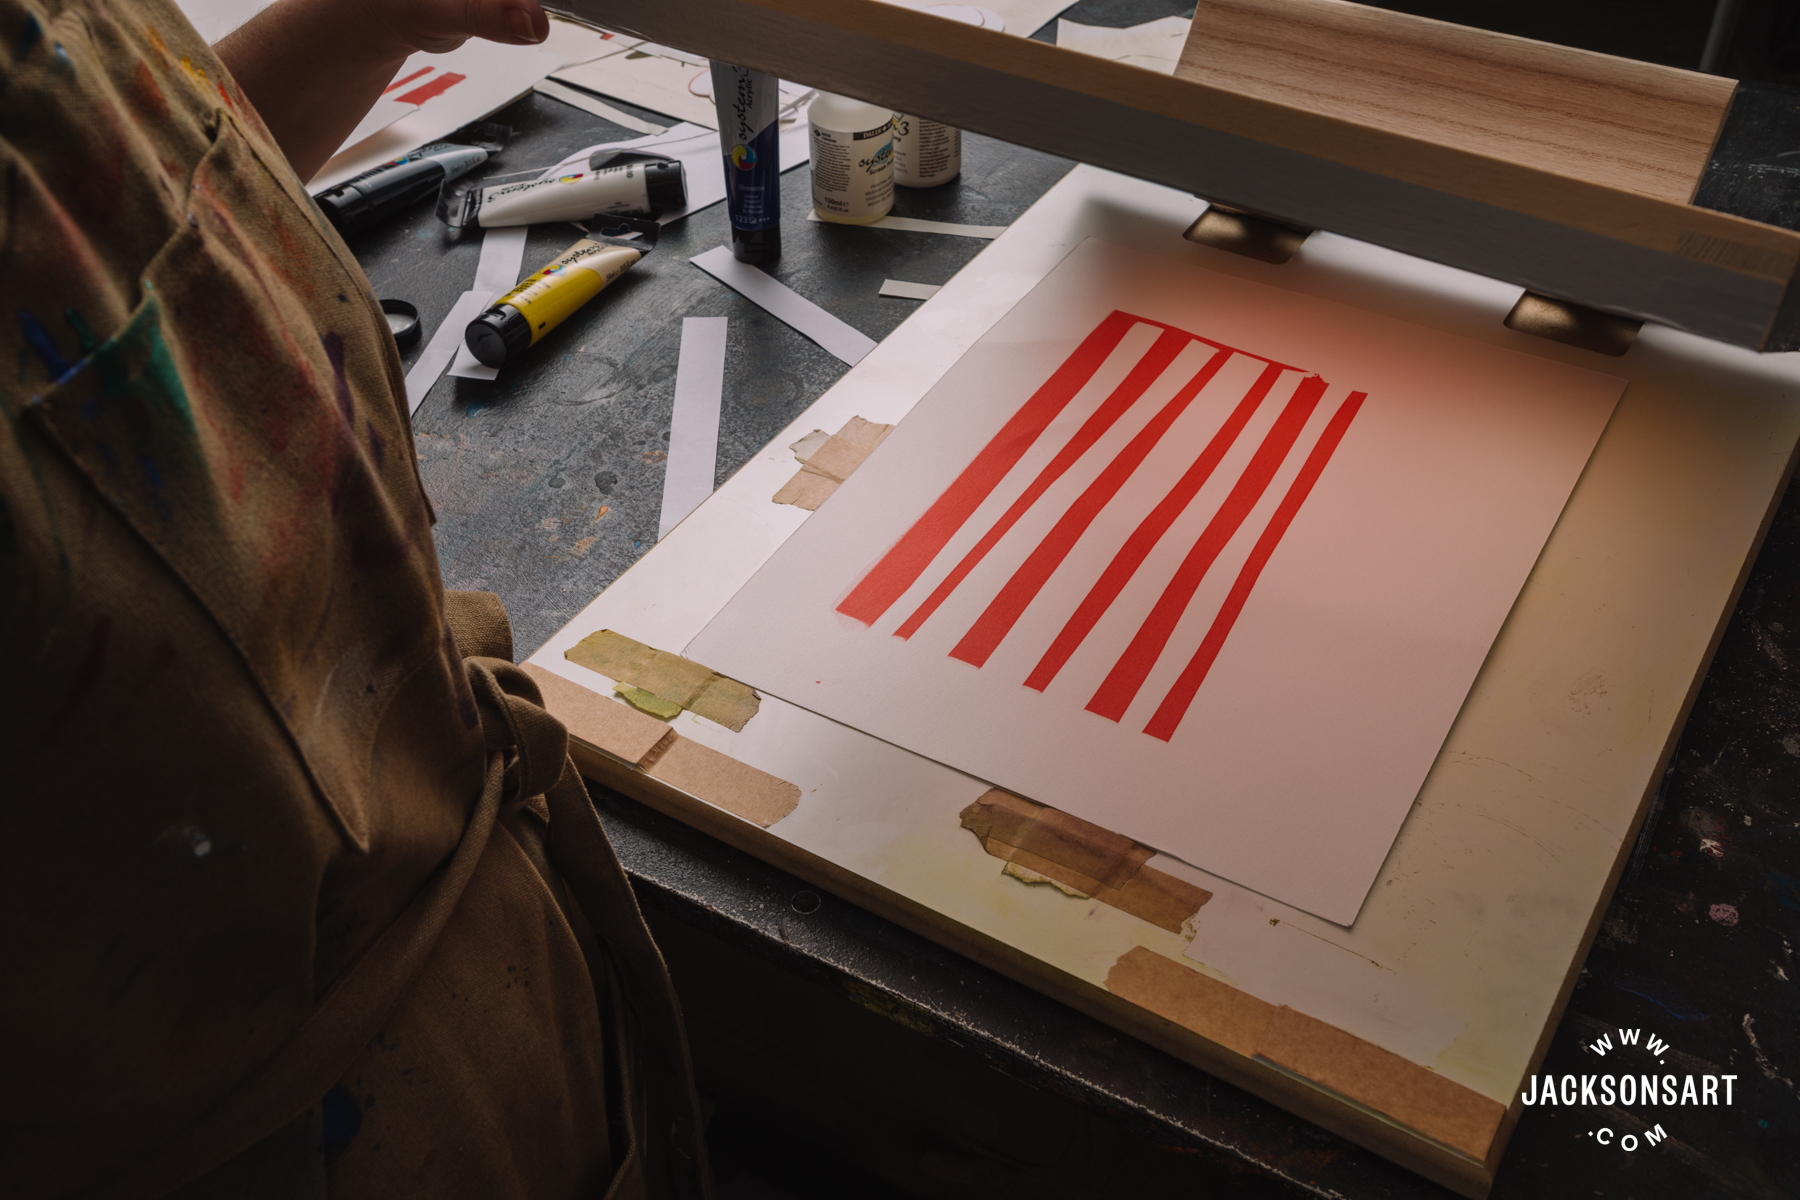
You can then bring your screen down on to your stencil and paper.
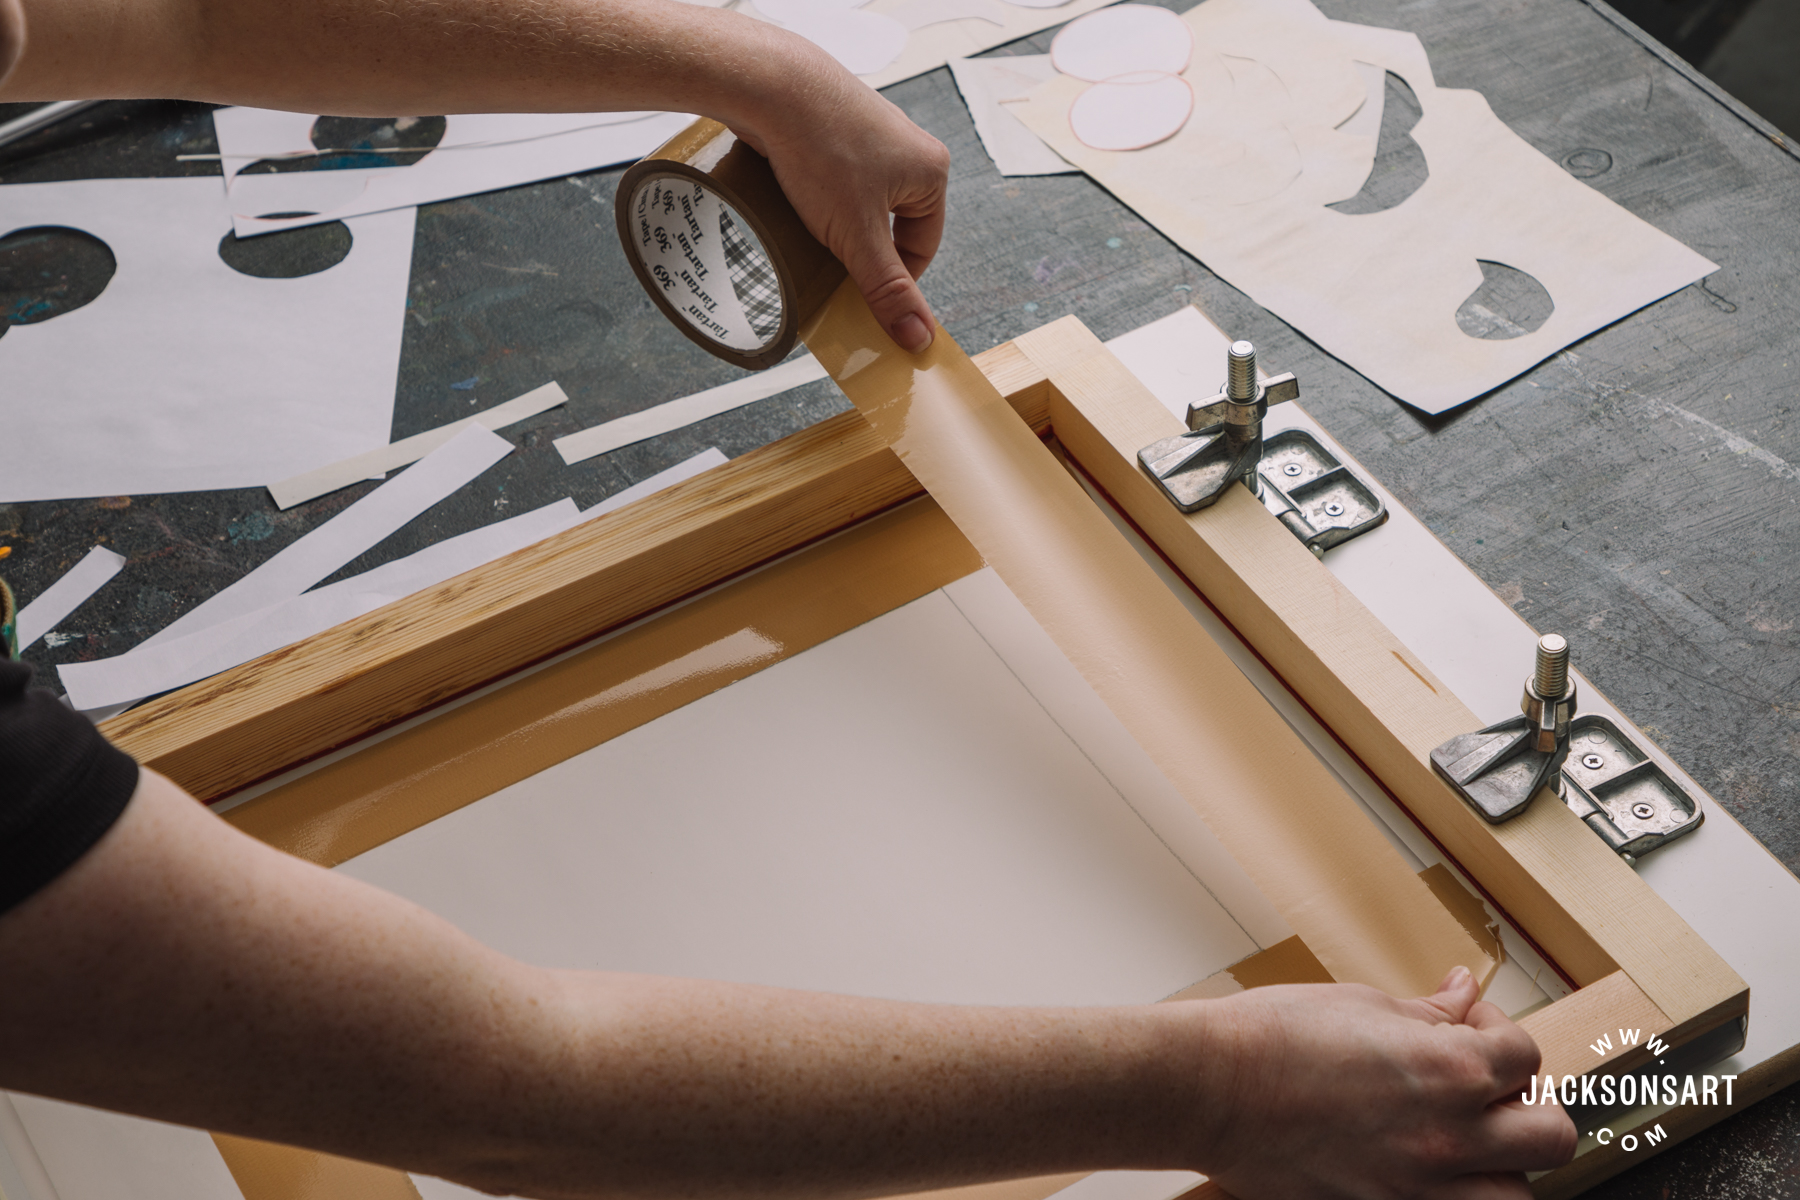
Next, it is worth taping the edges of your screen with parcel tape, or special ‘blue’ tape for this purpose. This is done to the back of the screen and effectively provides a border that prevents the newsprint stencil from doing all the hard work. The tape is a waterproof mask for the edges of your print. It’s worth taping right up to the edges of the printing area, and then remembering to remove this tape when your image is finished. If you leave the tape on the screen for weeks on end the glue may start to clog the mesh.

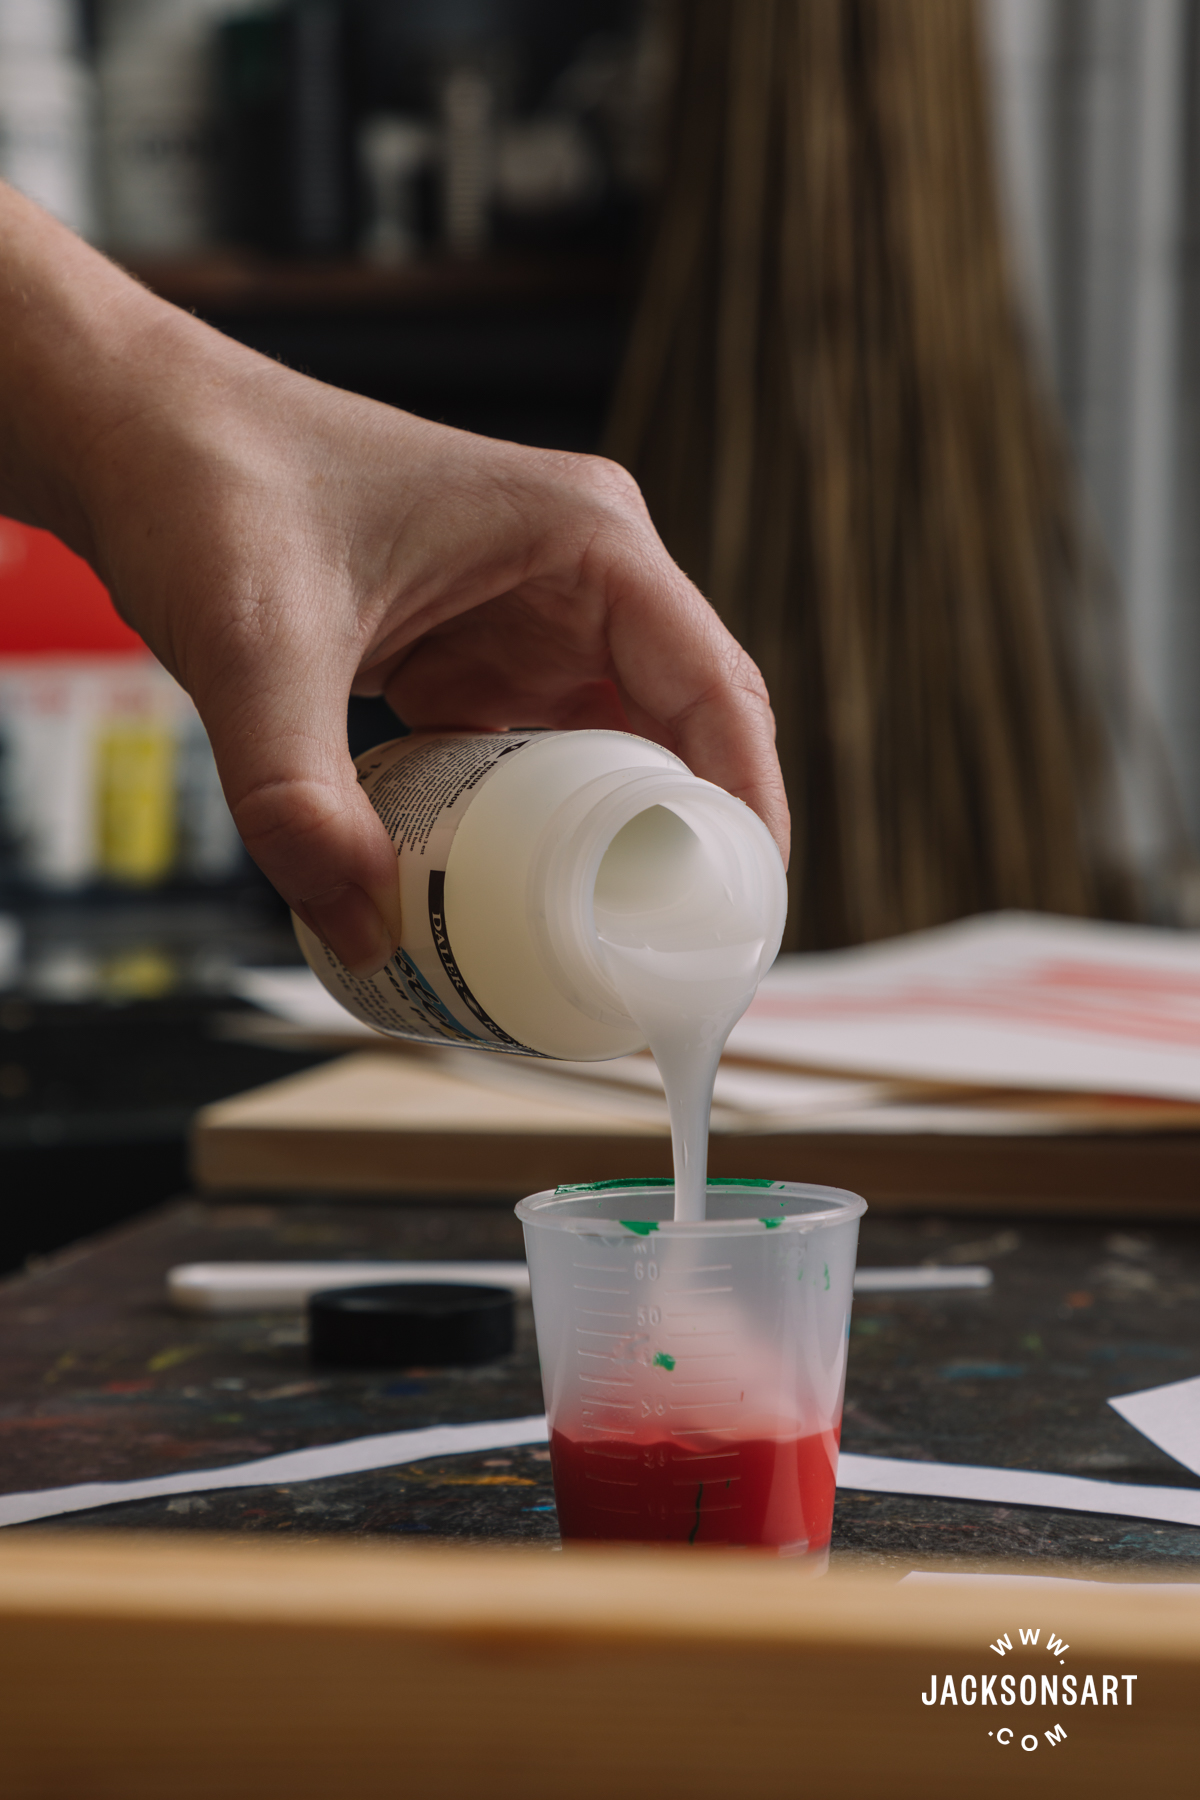
Make sure you are using the right medium (i.e. for paper rather than fabric), and mix thoroughly so the ‘ink’ is consistent throughout. It’s good to keep your ink in an airtight pot in case you need it at a later date. If you need it to stay wet for a few days or even weeks, you might want to also add some retarder to the formula to slow the drying further, although the screen printing medium will also slow drying to a degree.

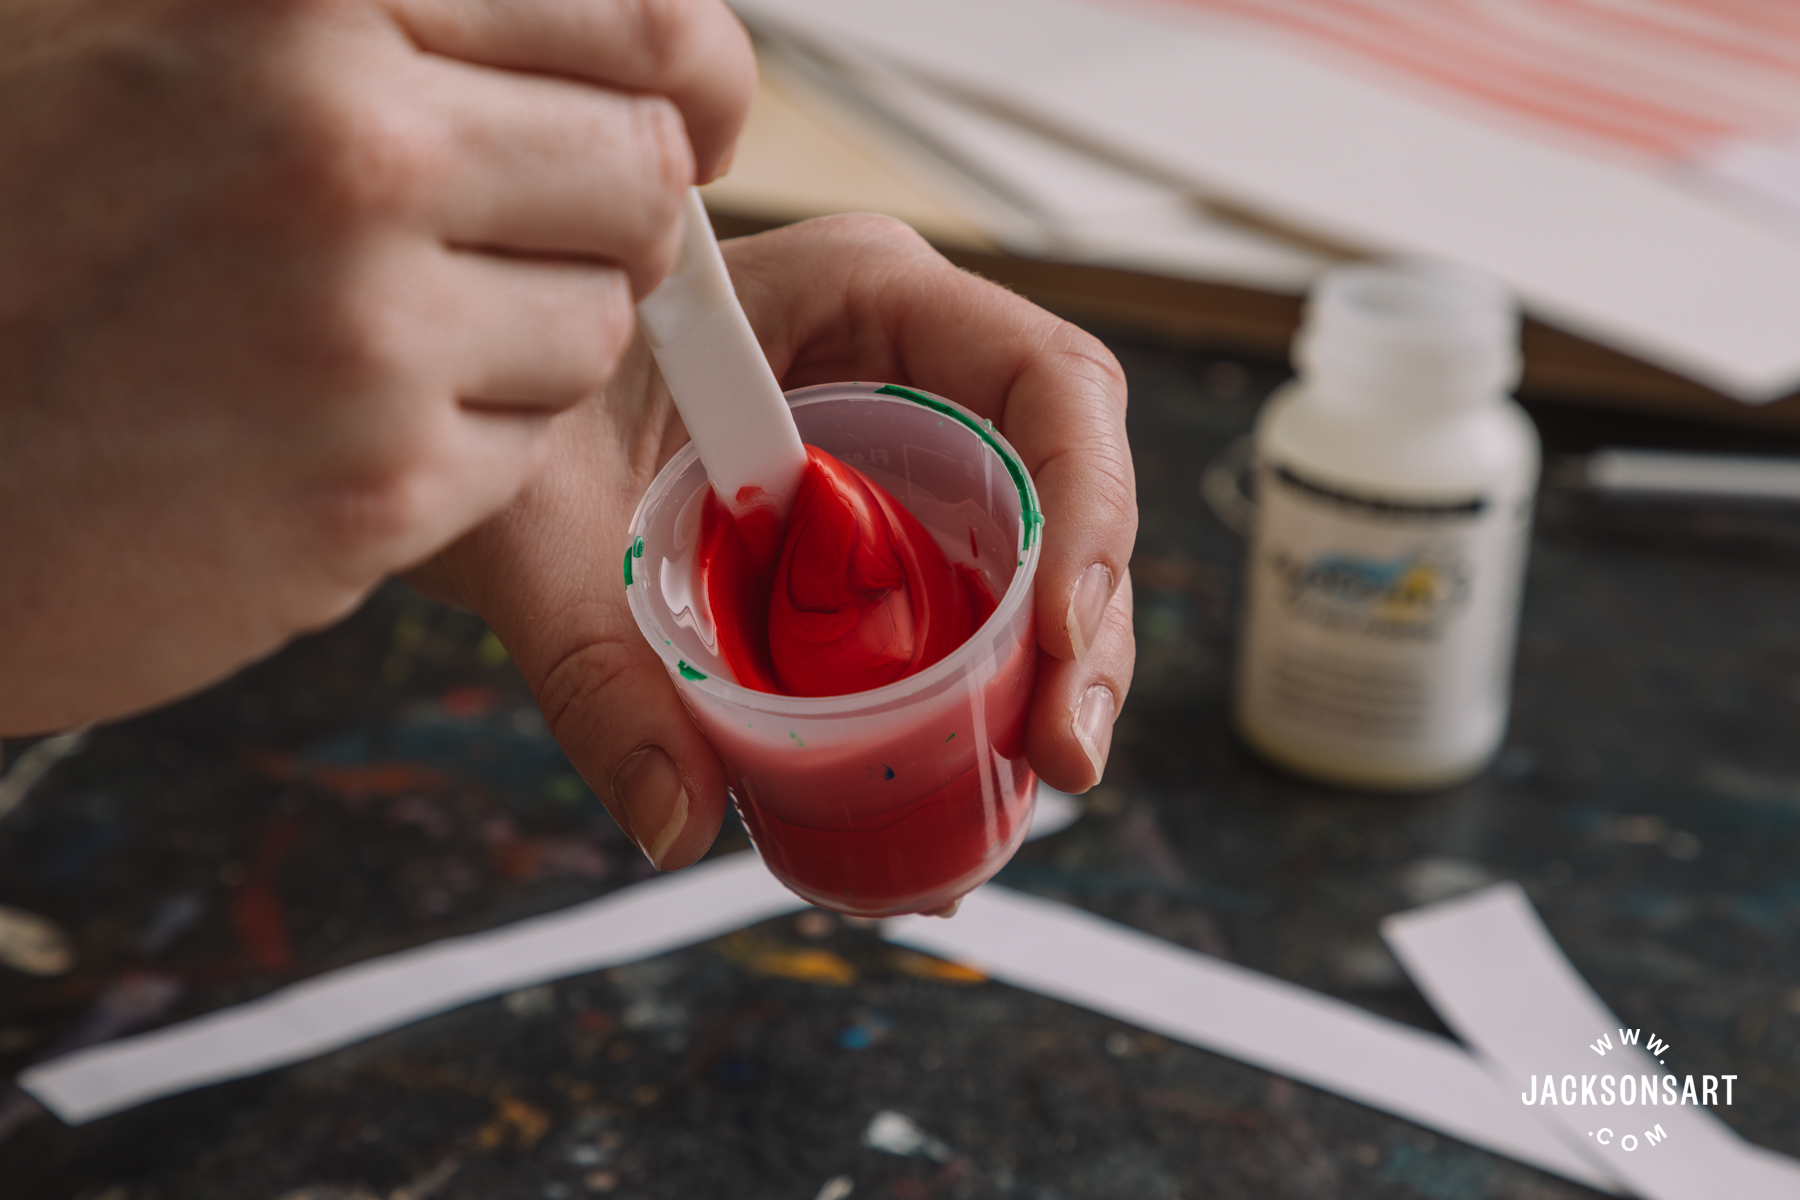
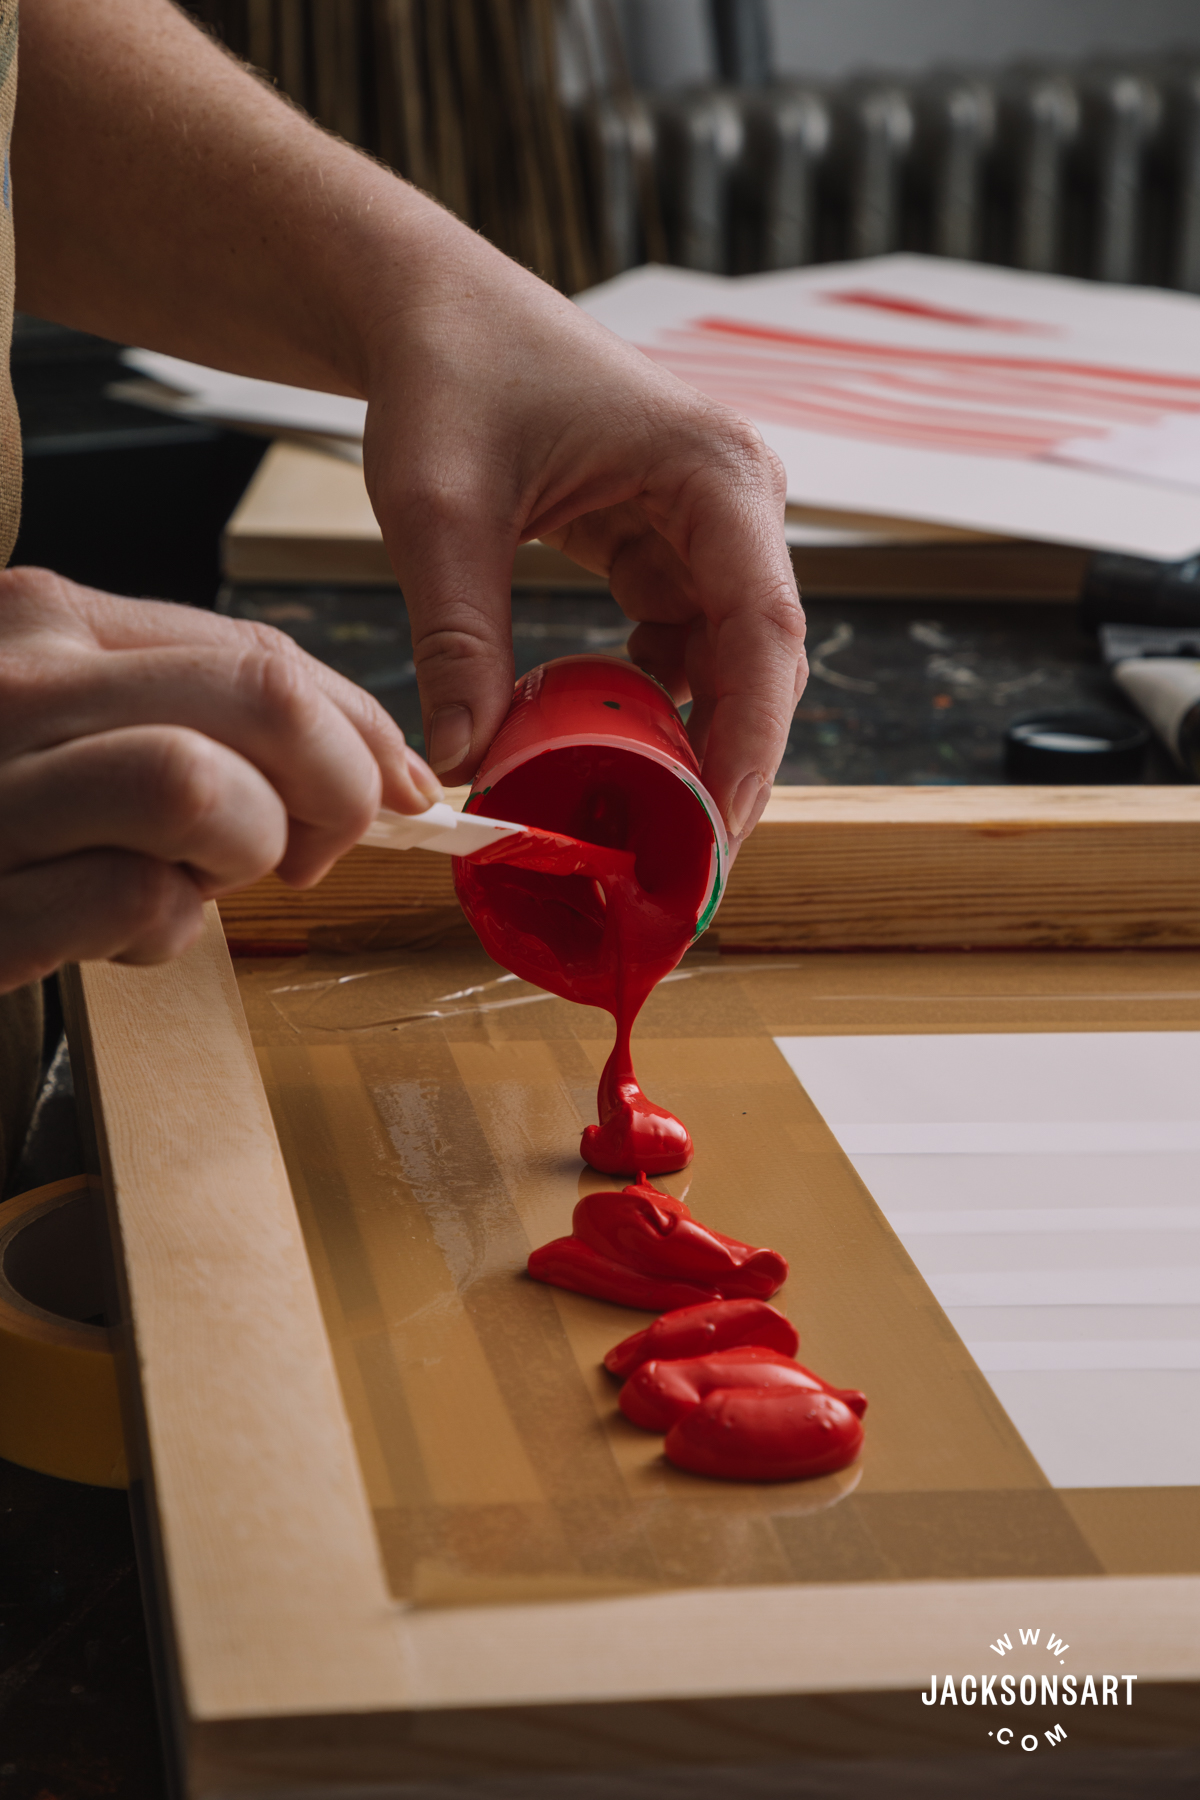
Next, you need to put a generous amount of colour on the edge closest to you, an even strip of colour along the edge of the width of the image area. Place the colour on the tape to make sure it doesn’t leak through to your paper just yet.
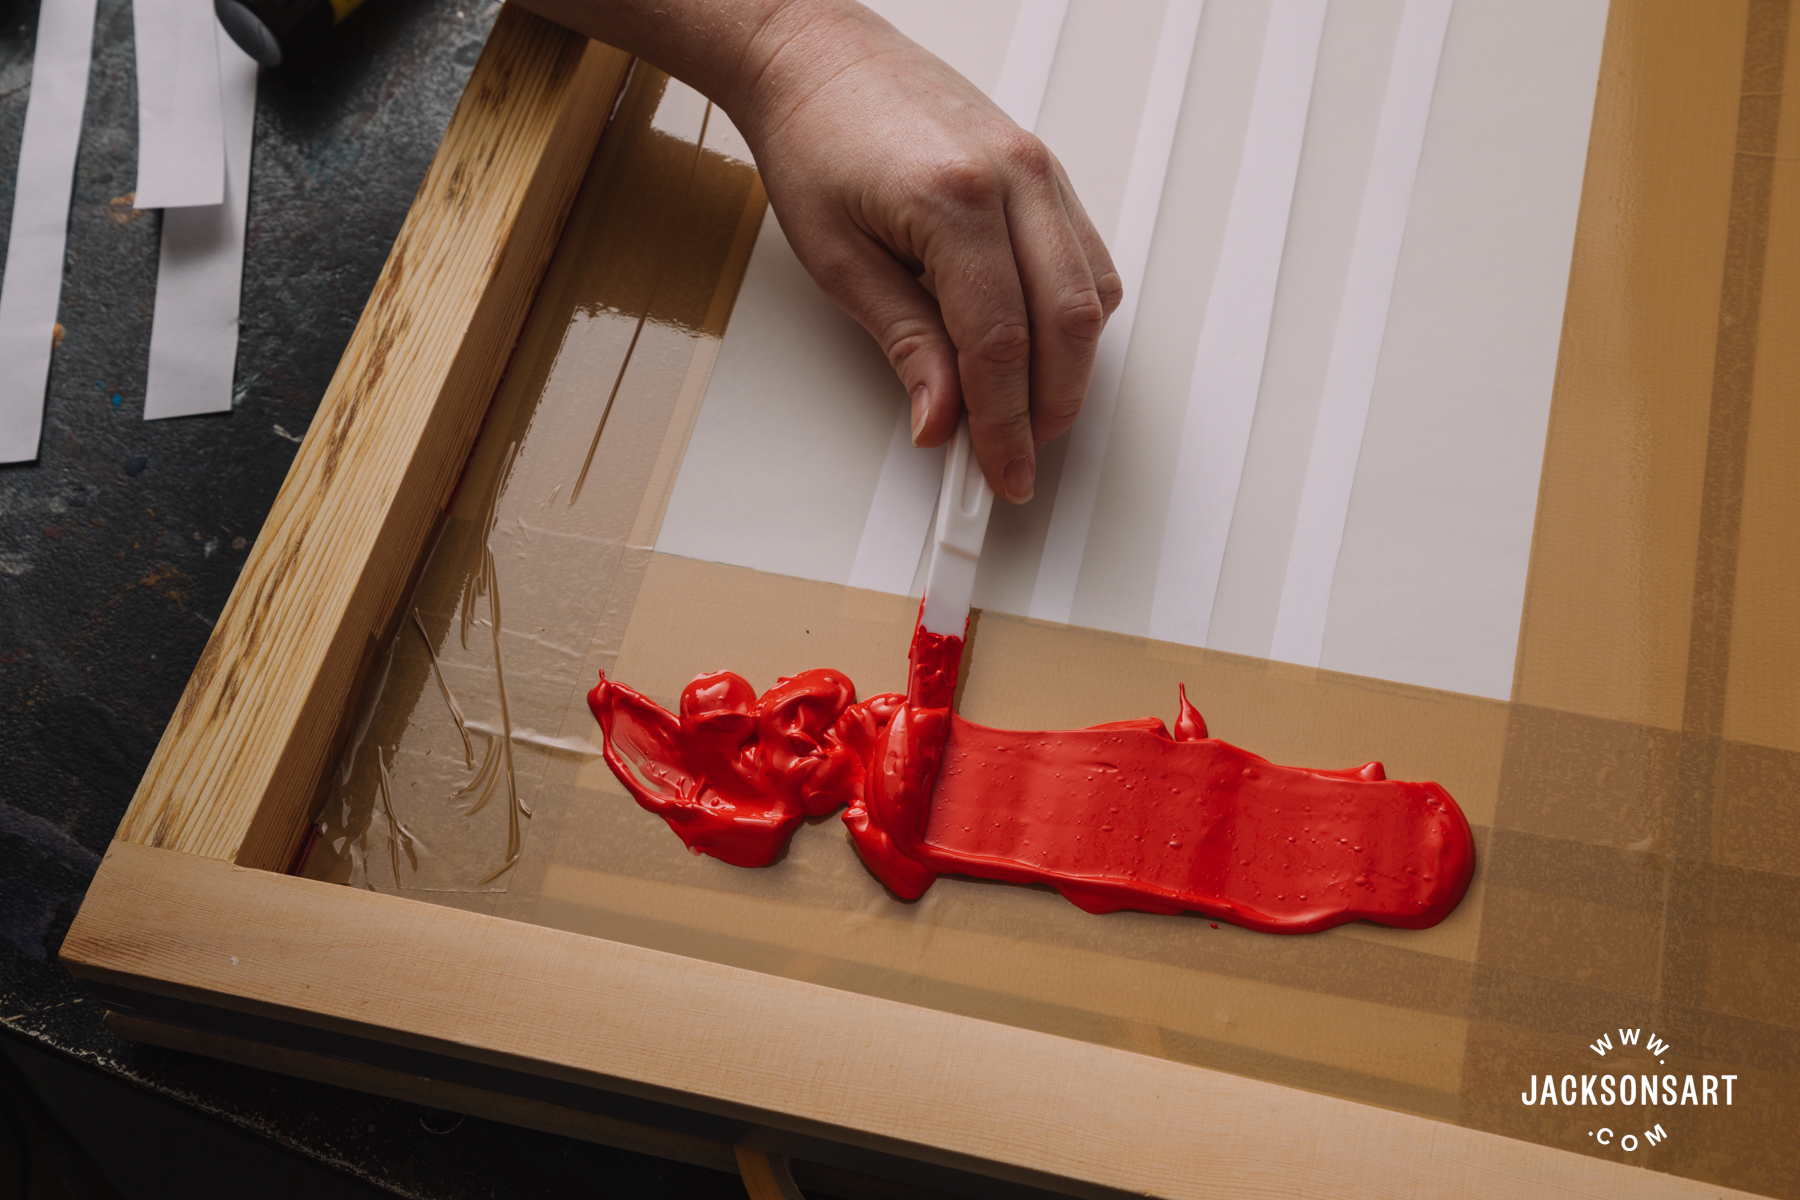
Then, you need to put something in between the screen and the board to ensure the screen is lifted while you flood the screen. A roll of masking tape is perfect!

Flooding the screen is the process of holding the squeegee to the screen and moving it in a wiping action from bottom to top of the screen, depositing ink evenly across the mesh. It takes practice to develop a technique to do this successfully across the screen, but I have found speed helps, with only a little downward pressure on the screen. It also helps to hold the squeegee at a more upright angle to the screen; not quite 90 degrees, but almost, holding the squeegee at an angle slightly away from you. For a small image such as this it isn’t absolutely vital the screen is fully flooded, but it does help with an even deposit of colour when you actually go to pull your print. Once you have flooded your screen you can then pull a print. It’s always best practice to flood the screen straight after pulling a print as this helps to stop ink drying in the mesh.
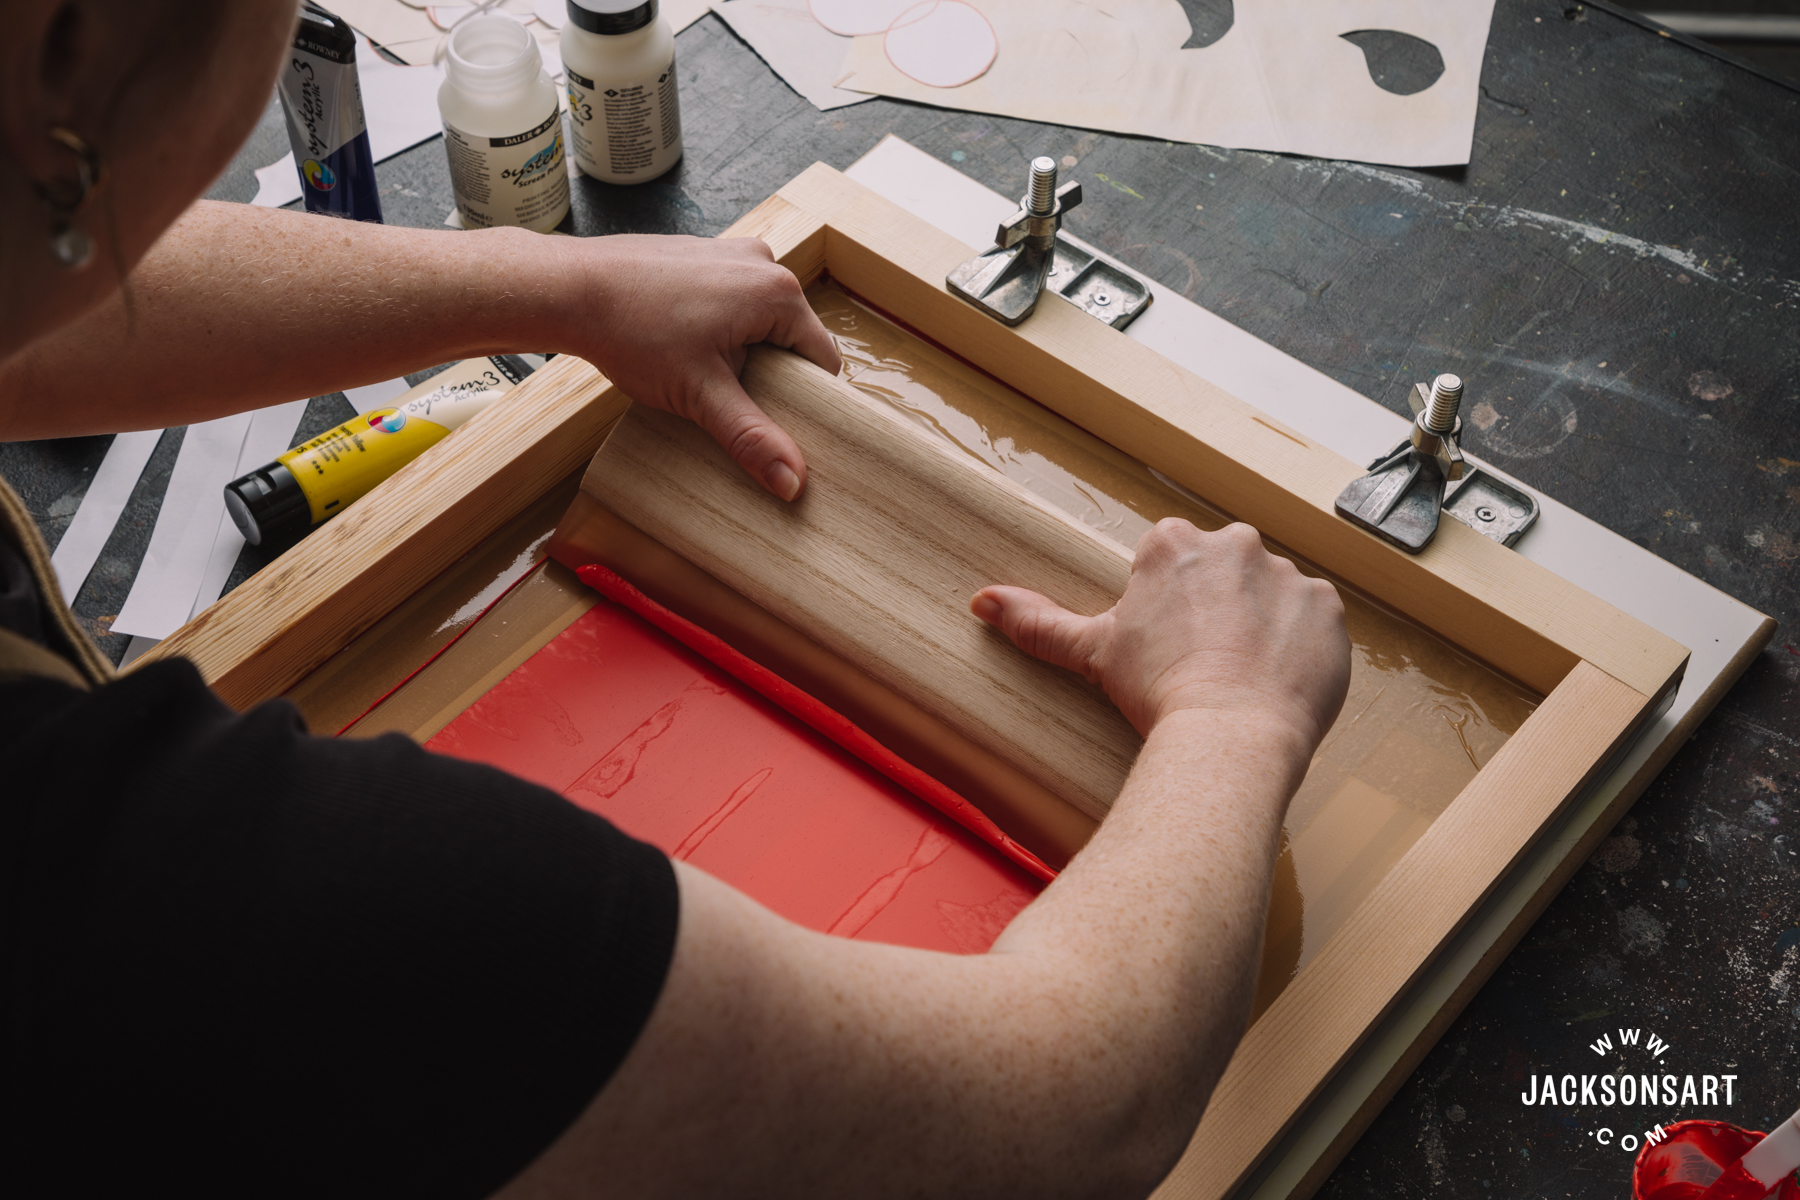
Once the screen has been flooded with colour, you can then pull your first print. Remember to remove the masking tape or other object holding the screen up! You need to hold the squeegee with both hands, pushing downwards with the same amount of pressure, and with some speed, pull the squeegee towards you at a 45 degree angle. This will push the ink that is flooding the mesh down onto your paper.

Once you have pulled your print you can lift the screen and see how the layer of colour has printed. If there’s any unwanted gaps you could try squeegeeing the screen again. When you’re happy you can remove the print from the board and put it somewhere to dry. Then place your masking fluid/object between the board and the edge of your screen frame and flood the screen ready to pull your next print.
Hopefully pulling the print will have pushed enough ink through the screen to act as an adhesive for the stencil, which should then stick to the underside of your screen and hold it in place for the rest of your prints.
You might want to use a chinagraph or All Surface pencil to mark on the screen frame where the hinges are attached, as this could help find the right position for the next layers for the print to achieve good registration.
Once you have printed all your first layers, scoop up as much of the remaining ink and put it back in your pot. It’s best to wash your screen as quickly as possible to avoid the ink clogging up the mesh. If you do it soon enough, you should be able to clean the screen simply with water and a clean sponge, but if that doesn’t do the job, you can use a scrubbing brush and a little washing up liquid. Try and keep the parcel tape where it is.
Allow all your equipment to dry fully (and your prints!) before working on the next layer.
When all the prints are dry you can cut your next stencil. As my aim was to print a gingham tablecloth, my next stencil consisted of strips of newsprint placed vertically across my horizontal stripes.

You then need to place your print with the new stencil placed on top within the registration guidelines and position the screen back in the hinge clamps so the print is visible through the parcel tape border.
Then it’s simply a case of repeating the printing process, flooding then pulling the print, ensuring there’s something holding the screen away from the board and paper when you flood the screen each time.
The more medium there is added to the ink, the more transparent the colour will appear, so you can see where the layers overlap in the print at this stage – the overlapped areas appear darker. There is no limit to the amount of medium you can add to the ink, but it’s best to always have more medium than paint in the ink.
Further Layers
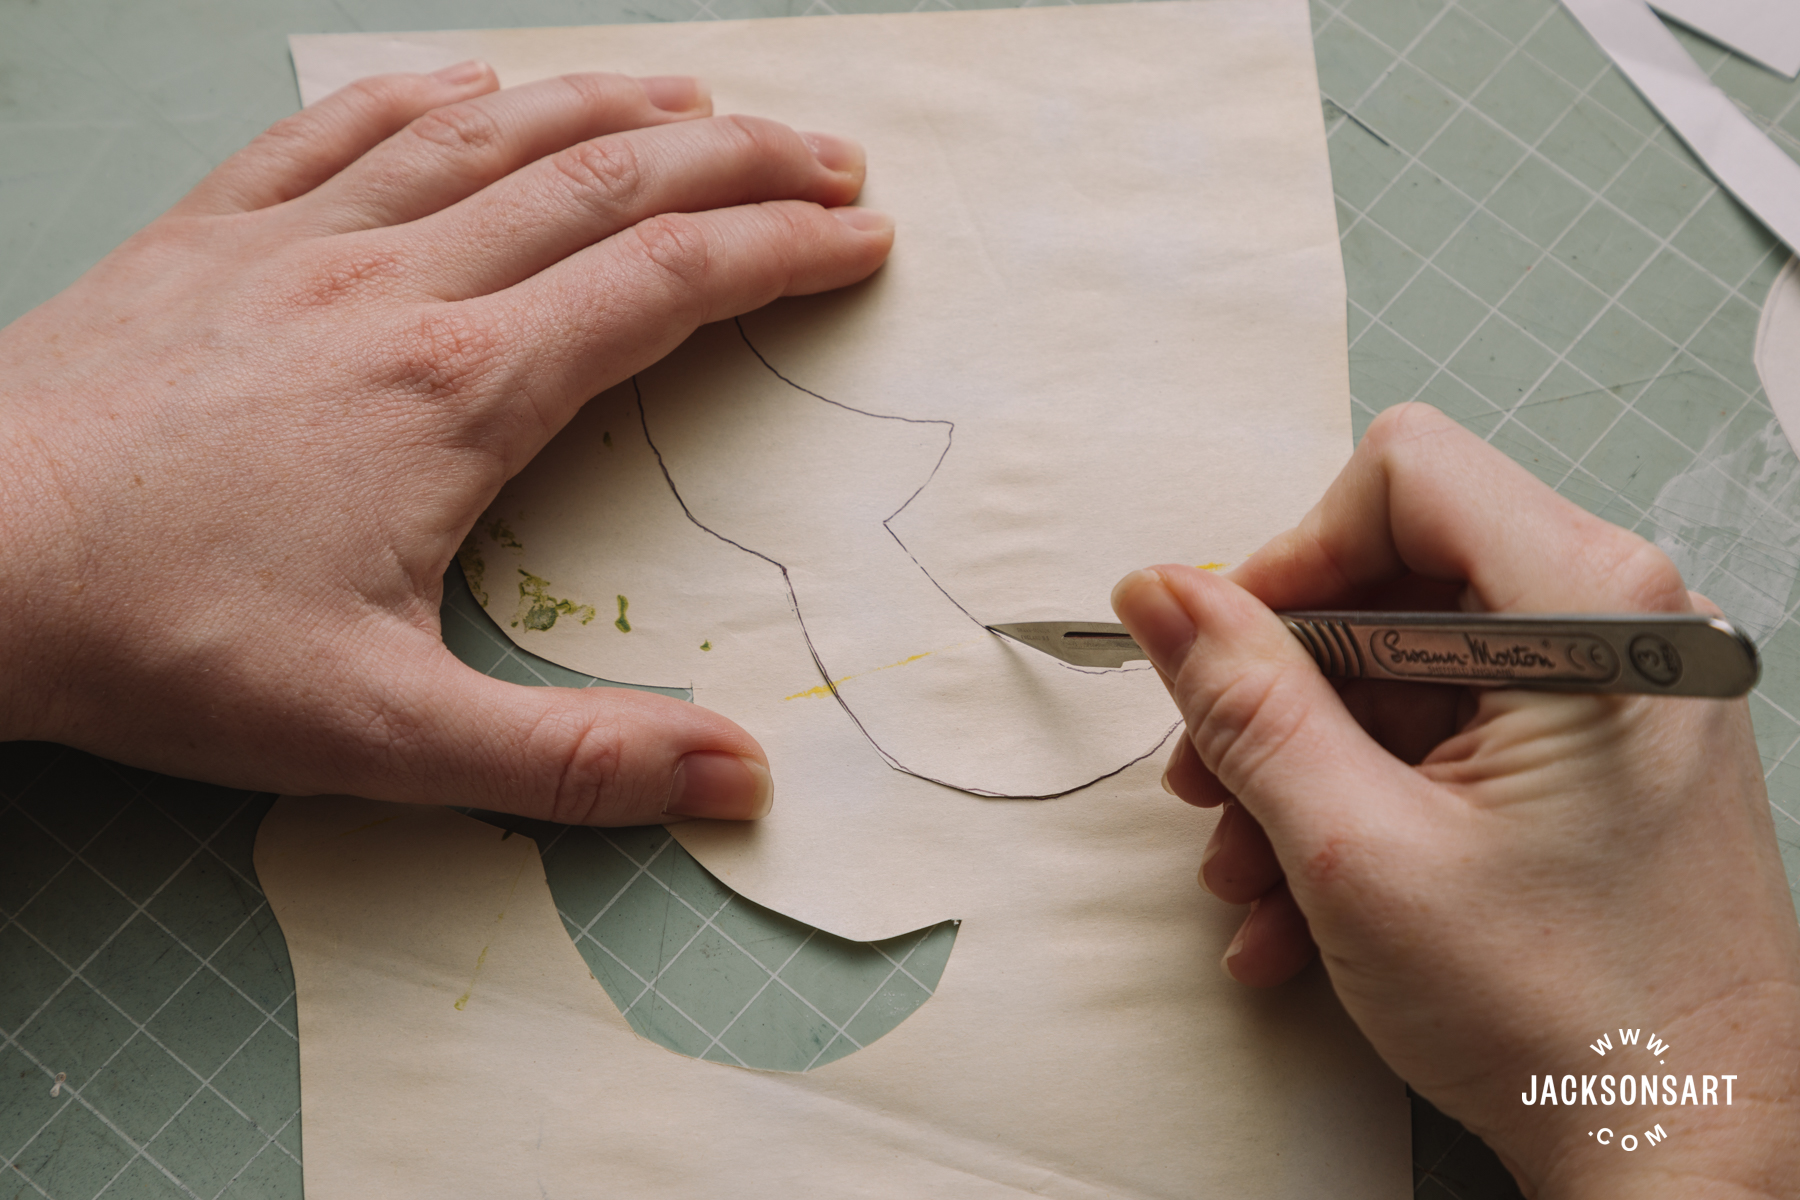
For the next layers I wanted to print my fruit on the table, and the shadows they cast. You may find at various stages that tracing paper is useful for placing on the image so far and mapping out where the next layers need to go. You can then place your drawing face down on to a new sheet of newsprint and draw on the back of the lines to transfer the drawing, ready to cut with a scalpel. Or you could use carbon paper.
The process is repetitious for each layer of colour, of cutting out stencils from newsprint, placing them where you want the image to be masked, mixing your colour, adding screenprinting medium, putting it on the bottom edge of the screen before flooding the screen and pulling a print. Remember to always wash the screen as soon after as possible, scooping up as much excess ink as you can with a palette knife. The colour can last for weeks in an airtight container, and if you do need the ink to stay wet for a while you can always add some acrylic retarder to it. When you have finally finished your print remove the parcel tape soon after and give the whole screen a good scrub with water and washing up liquid to make sure it’s completely free of ink and ready for your next screenprint edition.
When you first start out with screen print, keep the image small and simple, with just a few layers. I recommend working with stencils to begin with as the clean up process is relatively easy, and it’s possible to make something simple and bold relatively easily. Once you build confidence by making a few prints like this, you might feel inclined to work on a larger scale and maybe even invest in a bigger screen.
Further Reading
Screenprinting With Dave Buonaguidi AKA Real Hackney Dave
Screenprinting With Screentec Aqua Art Water Based Screen Ink
A Guide to Inks
Screen Printing With Jackson’s Studio Acrylic Paint
Shop Screenprinting at jacksonsart.com