
[ad_1]
Eggs are miracles of engineering – potent ample to withstand the grownup chook sitting down on them, nonetheless weak enough for the small chick to make its escape. They offer the budding artist with a prosperity of patterns, textures and colors to analyze. In this tutorial I will show you how to paint eggs in watercolour, I hope you share your completed pieces beneath in the remarks!
Introduction

Chicken eggs supply a great inspiration and lesson to the watercolourist, with their stunning designs and camouflage:
- How to combine intriguing muted colours
- How to paint a smooth changeover from dark to gentle
- How to lift out a gentle highlight
- How to realize speckles and designs
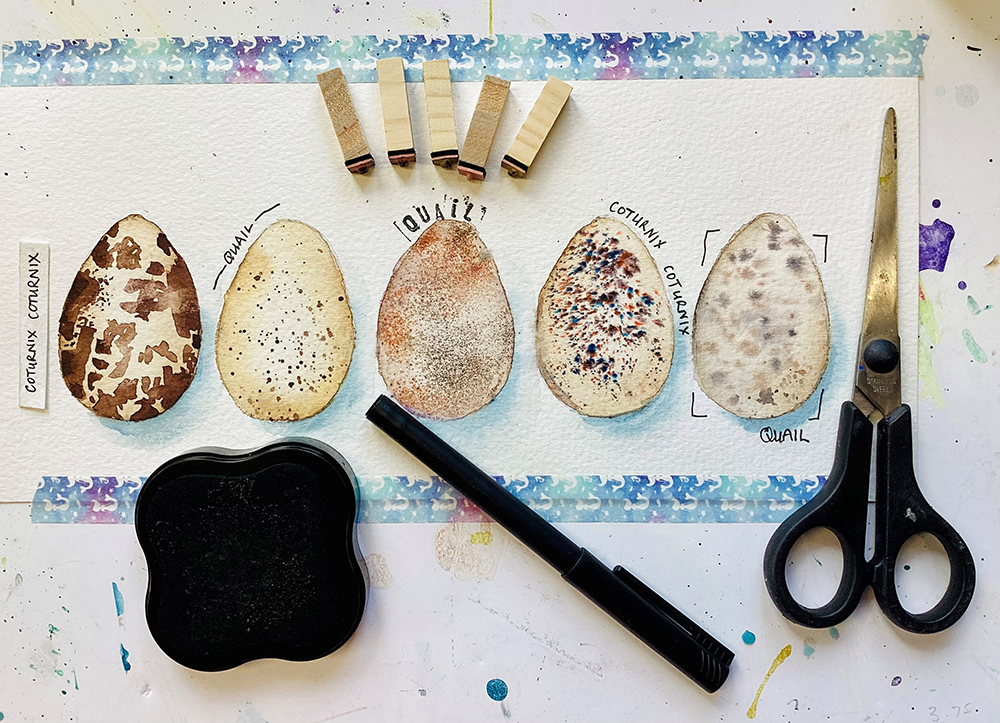
You need to never disturb a bird’s nest, so the place will you get a gorgeous egg to review? Step forward the quail. Its little eggs, just about every with breathtaking markings, are normally readily available in supermarkets. So get a boxful and question at their beauty…
Color Mixing
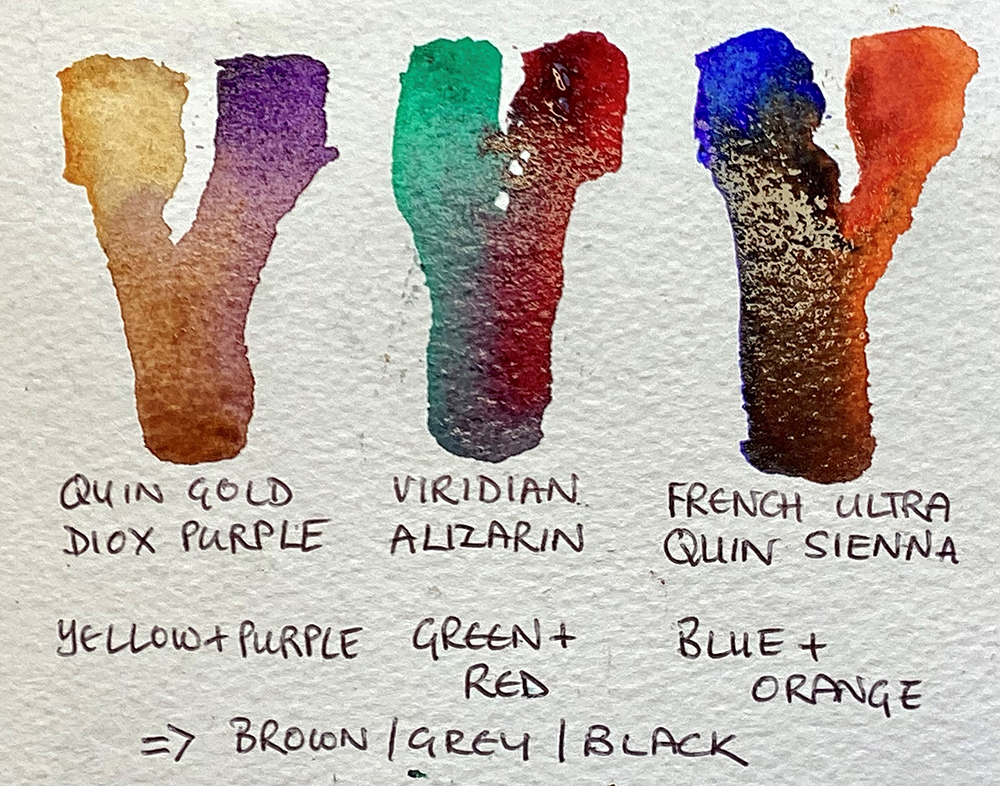
Did you know that birds see differently, so to them eggs seem brightly colored? On the other hand to mammalian eyes, eggs are usually muted so we require to blend colours which are even now exciting devoid of staying overly daring.
Rather than reaching for a completely ready blended color, try out mixing complementary colors (individuals found reverse each individual other on the color wheel). You will uncover that in the proper proportions the pairings of purple and yellow, green and red or blue and orange, will make subtle and wonderful shades of gray and brown. Have a go at mixing pairs to come across which combos give beautiful final results.
Elements essential
The sketch
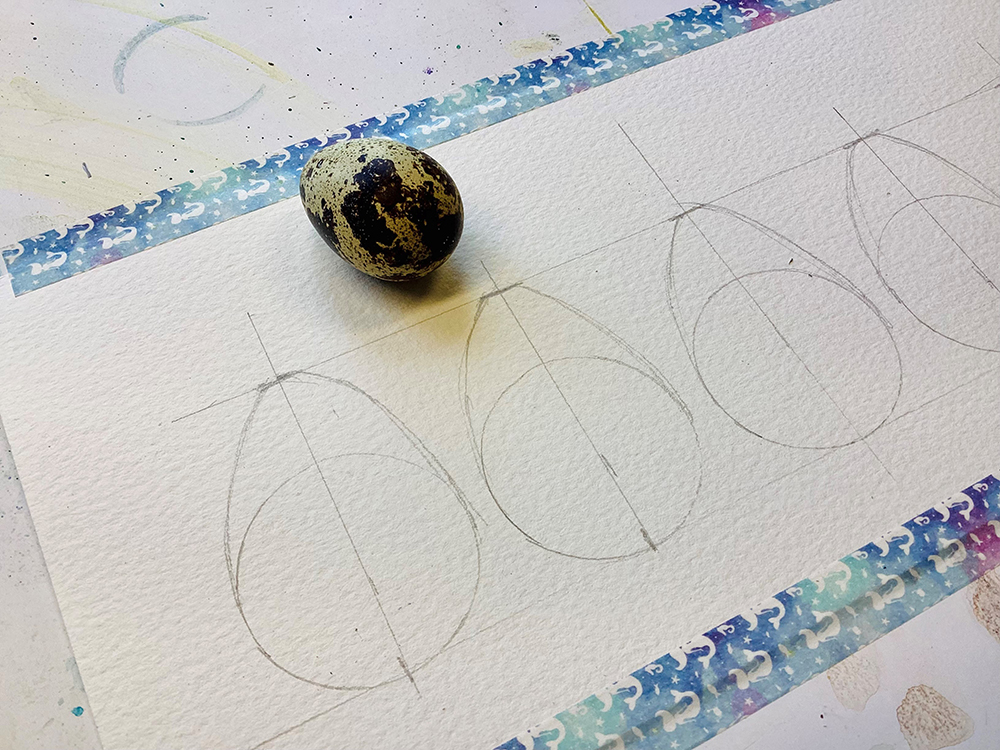
While you can locate egg templates on the internet, they are quick to draw. Initially examine the width to size. I uncovered the quail eggs ended up close to a person and a fifty percent the width very long. Now use one thing spherical to draw a circle. Mark in the centre line and on that line mark the length of the egg with a small horizontal line. Draw an arc from the conclusion of the limited line to the widest point of the circle. Transform the paper spherical and attract a matching arc the other side. Adjust if they are a minor wonky, rub out the development strains and you now have your egg.
Portray the eggshell
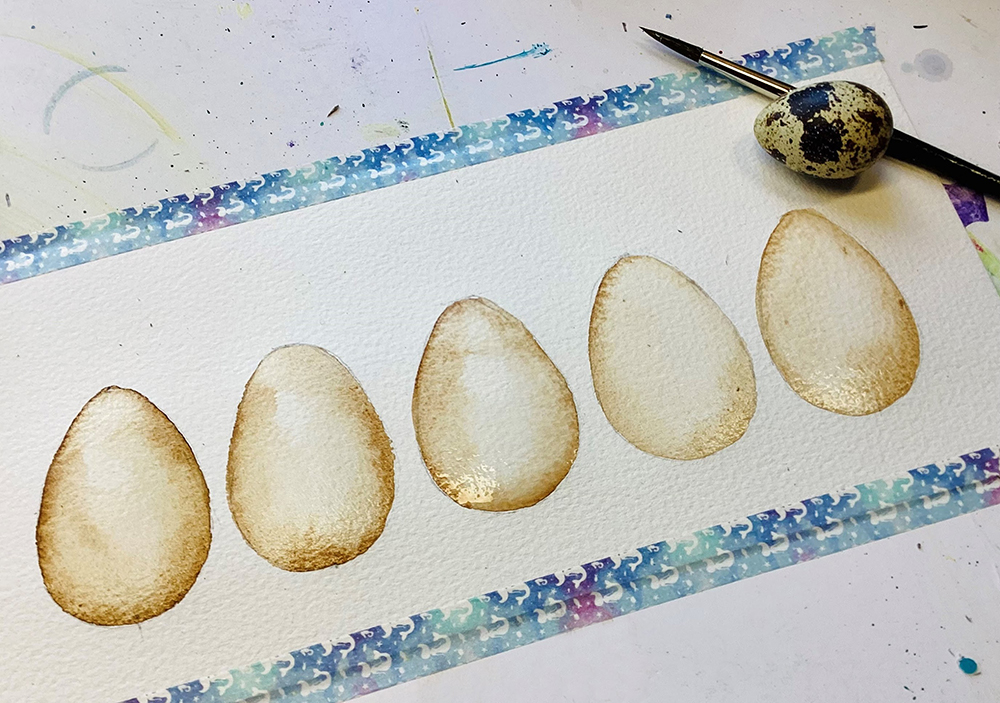
Eggs are fantastically smooth, so we need to have to ensure our washes are not blotchy. There are two ways of attaining this. To start with blend up your selected mixture of complementary colors.
If you are a fast employee with a steady hand, basically outline the egg shape in paint and then with a clear, moist brush blend into the center. Observe in which the highlight is and both mix to clear h2o or use a thirsty brush (a cleanse moist brush) to pull off some soaked color to generate the delicate spotlight.
If you operate extra slowly or points dry too quick, you can pre soaked the total egg with clean water and then contact in colour about the edges. It will normally mix as a result of the h2o and you can gently even points out with your brush.
If your eggshell is not dark more than enough allow it dry and layer.
Creating the speckles
Technique 1 – Paint soaked on dry
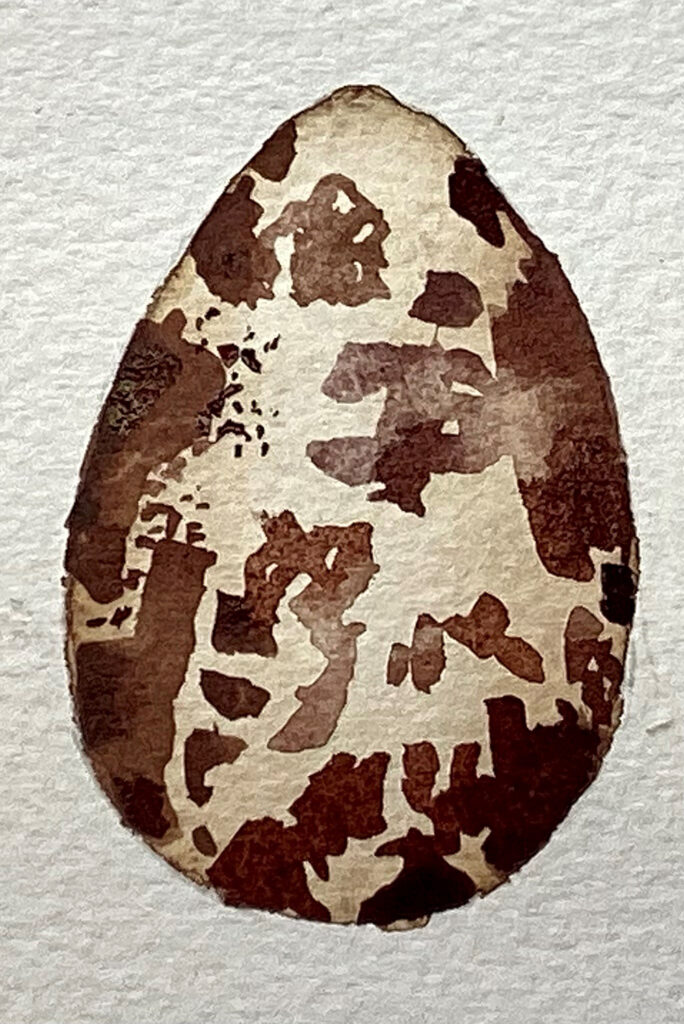
Observe the marking and paint them with a darker mix. Remember they will be lighter exactly where the spotlight is, so paint them in, let dry a tiny and then elevate a little bit with a piece of kitchen towel. Vary the dimension and form as nothing is entirely standard in character!
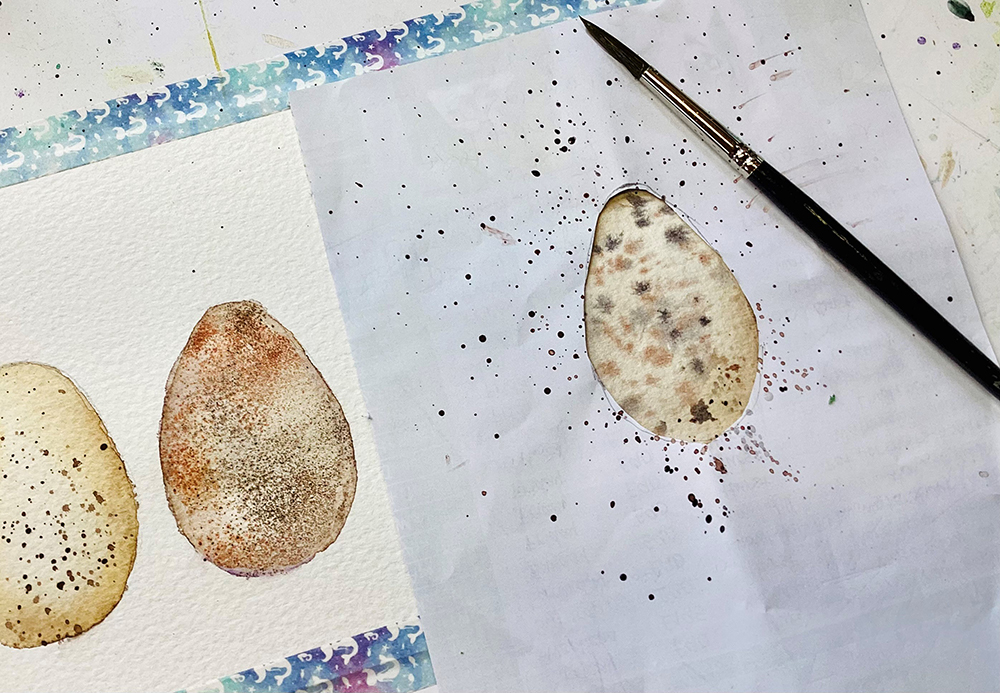
Approach 2 – Spatter damp on dry
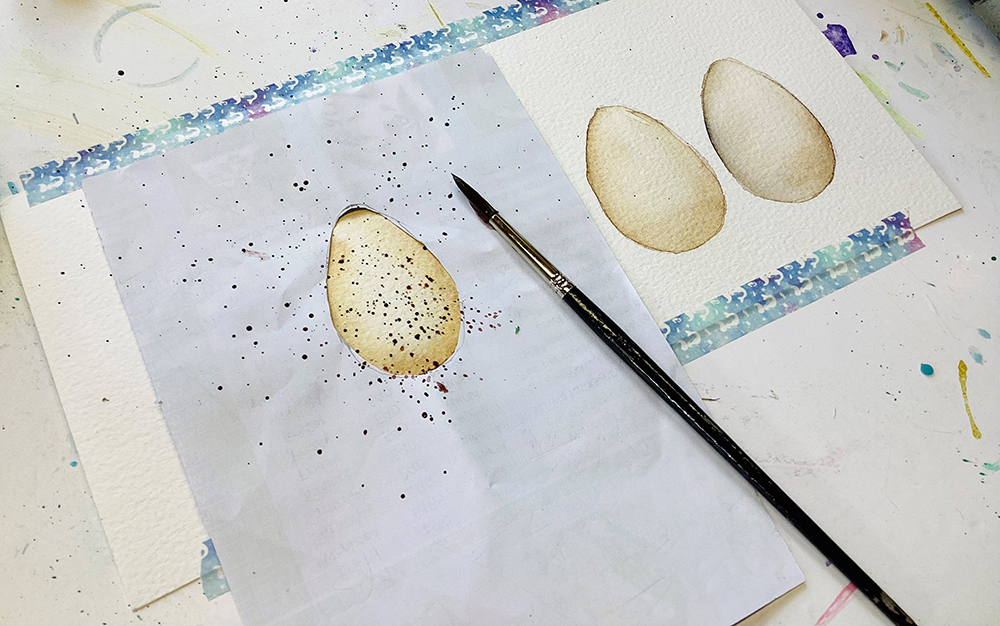
To stay away from spattering the history, slash an egg form out of a piece of paper and use it to mask your do the job. Load your brush and gently faucet it on your finger to launch modest drops of paint. You can layer diverse colours. Enable them dry among except you want them to combine.
Method 3 – Color sanding
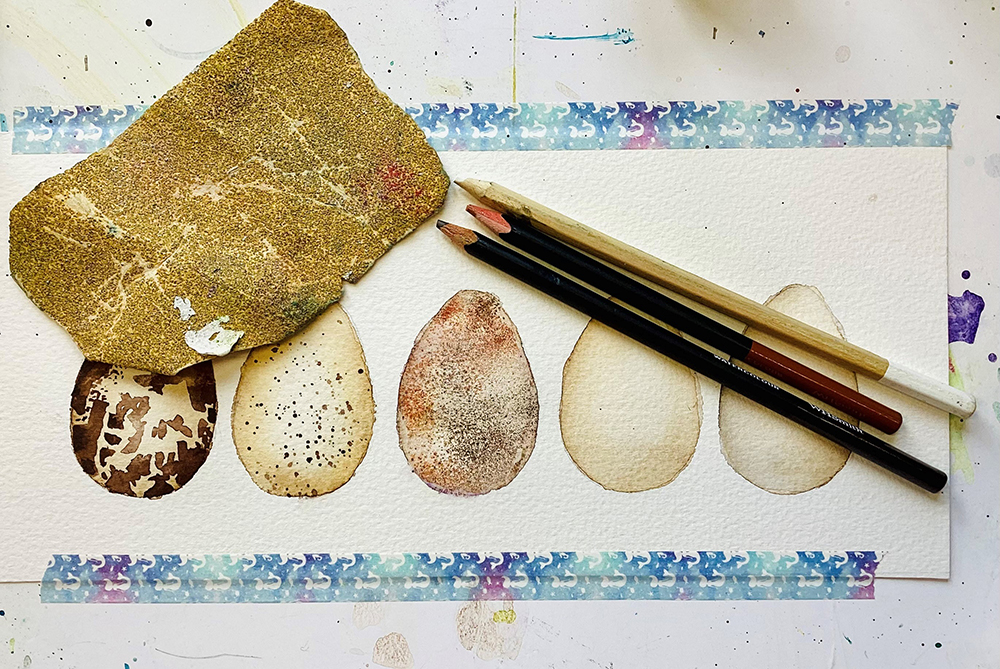
Dampen your egg with clean h2o and then consider a watercolour pencil and sandpaper (or a nail file). Carefully sand the tip of the pencil to release a fine dust. This will adhere to the damp paper. Any surplus can be blown absent. If your paper is moist relatively than moist, the pencil will start to dissolve supplying larger sized softer marks. Do not go back more than with a moist brush as this will dissolve the speckles.
Approach 4 – Brusho

Brusho is crystal ink. It’s very extreme and a tiny goes a extensive, extensive way. By putting a drawing pin as a result of the lid you can build a very small sprinkling hole and can seal it afterwards. Some (not all) colours are a blend. Black is 1 of these, so when sprinkled onto damp paper you will see specks of blue, Sienna, brown and many others. As soon as once more dampen your egg form, enable the drinking water sink in and then sprinkle in some Brusho and view the magic occur. Blow absent the surplus.
System 5 – Splatter wet on moist
Dampen your egg and then mask as just before. This time spatter into the damp and you will get comfortable edged marks. You could use a handful of colors to develop curiosity.
Having points further
- Incorporate strategies – Attempt combining the approaches in a single egg – maybe start out with soft soaked in wet, dry then paint damp on dry, in advance of ending with a high-quality color sanding….
- Insert in a shadow – blend up a blue gray (by including a small orange/brown to your blue). Moist the shadow place and fall the color in. Use a thirsty brush to obtain a tender edge.
- Increase text – how about creating your portray appear like a museum collection? You could publish right on the portray, use printing blocks or collage.
- Varnish – you could use acrylic varnish to make your eggs shiny in distinction to the matte of the encompass. Both of those Brusho and watercolour pencils will need correcting before brushing on varnish.
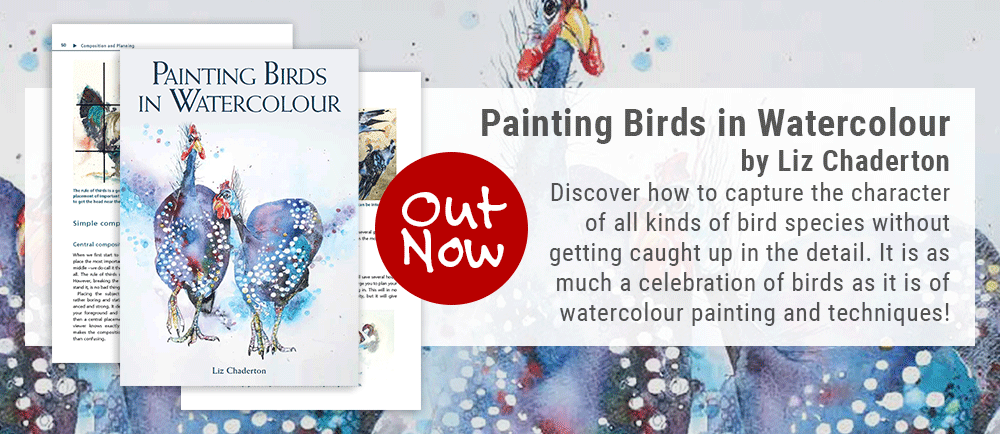
- Differ your eggs and make styles – recreate a all-natural background museum exhibit by different the egg dimension, color and markings. A comprehensive action by stage of this is in Chapter 8 of Liz’s new e book (see down below).
About Liz Chaderton
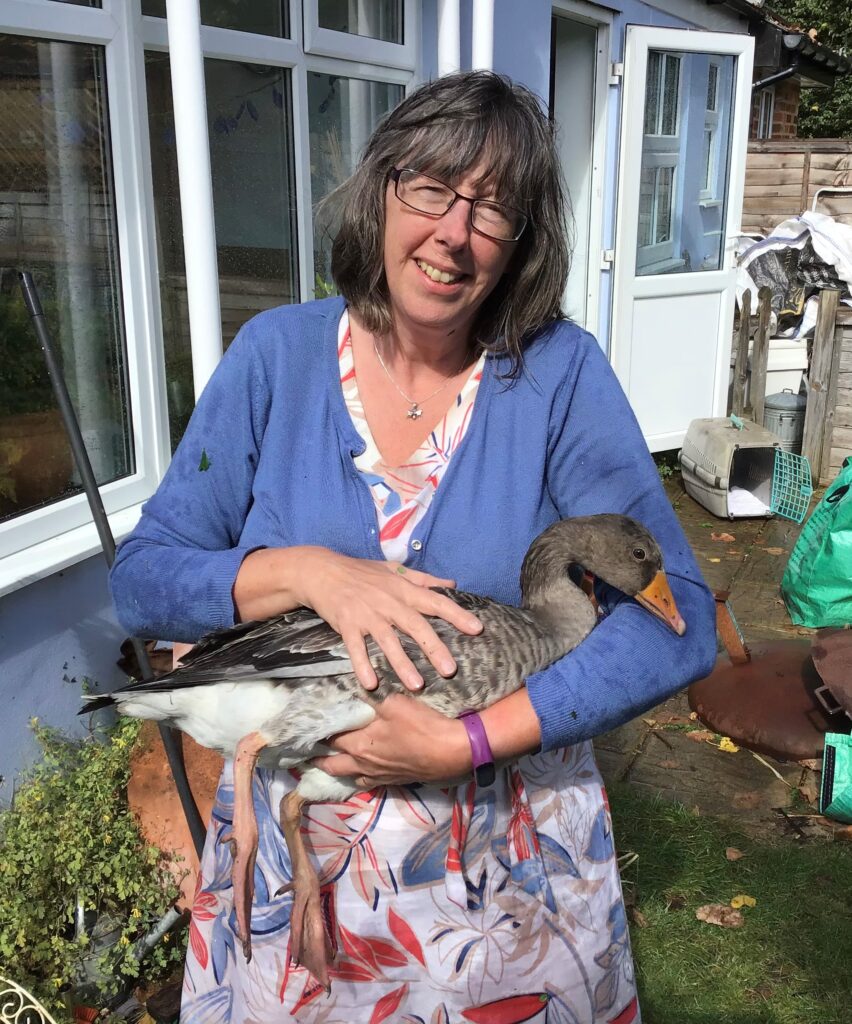
Liz Chaderton, pictured in this article with Gertie the goose, is a qualified artist based in Berkshire. Her fourth book ‘Painting Birds in Watercolour’ is revealed by The Crowood Push on 25 July 2022 at £12.99 (ISBN: 9780719840814). Additional of her get the job done can be viewed at www.lizchaderton.co.uk
[ad_2]
Resource connection


